


Table of Contents
Try Testkube free. No setup needed.
Unlock Better Testing Workflows in Kubernetes — Try Testkube for Free


Table of Contents
Executive Summary
The Testkube community is getting bigger and stronger each day, and your contributions help us accelerate development. Playwright has been on Testkube’s radar since July 2022.
We are grateful and happy to announce that we support Playwright in Testkube’s version 1.10!
What is Playwright Testing?
Playwright is one of today's most popular end-to-end testing frameworks. Since its inception in January 2020, it has supported end-to-end testing, multiple browsers, operating systems, and languages, among many other features that make the work of modern developers and testers more efficient.
Testkube is a test orchestration tool that helps projects move their test automation to the cloud. It is built on top of Kubernetes, enabling users to run tests close to their existing development environment. For a list of all the supported testing tools, please visit the official Testkube documentation.
With Testkube, you can easily automate the Playwright tests you create and test your applications running on Kubernetes in a cloud native way. It will help you visualize the state of all your tests in one place, making it easy to deploy new ones and manage existing ones.
Getting Started with Playwright and Testkube
Running a Playwright test with Testkube is a straightforward process. To install and get familiar with Testkube, please consult our Getting Started guide.
It is also important that your Playwright tests are available in a Git repository. Testkube supports working with files, URIs to files, Git files, and Git directories. Given the nature of Playwright tests, Testkube is expecting Git directories as input to the Playwright configuration.
Prepare your Playwright Tests for Docker Containers
Playwright has numerous functionalities. Running automation in containers imposes some limits on which features are accessible. If you are already running Playwright in your CI/CD pipelines, you probably have a good understanding of which features are available, and how you should configure your test runs.
Our examples below will use the official Docker image from Microsoft, which means you cannot write or generate code, spin up browser windows, inspect traces, do anything GUI-related, or interact with the run on the command line. You will need to have the tests already written and be able to run them without any manual assistance. Playwright has a great explanation of its Test Runner on their website. They not only explain how to create runner-compatible tests but also how to configure and collect the necessary artifacts: screenshots, videos, and traces.
Import Playwright Tests into Testkube
There are multiple ways to work with Testkube. In this blog, we will show only the most popular ones: the UI and the CLI. Some users prefer to use the APIs or CRDs via ArgoCD or Flux. GitHub Actions are also supported.
Create and Visualize Playwright Test Workflows Using Testkube
Test Workflows provide a comprehensive, purpose-built solution for managing the full lifecycle of running tests against your applications and their components. These are stored as custom resources in your cluster, making them easy to manage using existing Kubernetes tools and GitOps pipelines. Hence, when running Testkube, you’ll benefit from creating Test Workflows.
After setting up Testkube in your KinD cluster, you can configure a Testkube agent to talk to the dashboard. Once this is done, you can start creating Test Worfklows.
As mentioned earlier, there are two ways to use Testkube to manage Test Workflows:
- Testkube Dashboard: Suited for self-hosted control planes
- Testkube CLI: Suited for your CI/CD pipeline.
Using the Testkube Dashboard
Using an existing example is the easiest way to create a Test Workflow using the Testkube Dashboard and understand how it works.
Choose Playwright from the wizard, provide a name, and you’re ready to execute your Test Workflow.

Testkube configures everything else for you, from resource allocation to artifacts and log collection. All you need to do is trigger your Test Workflow.

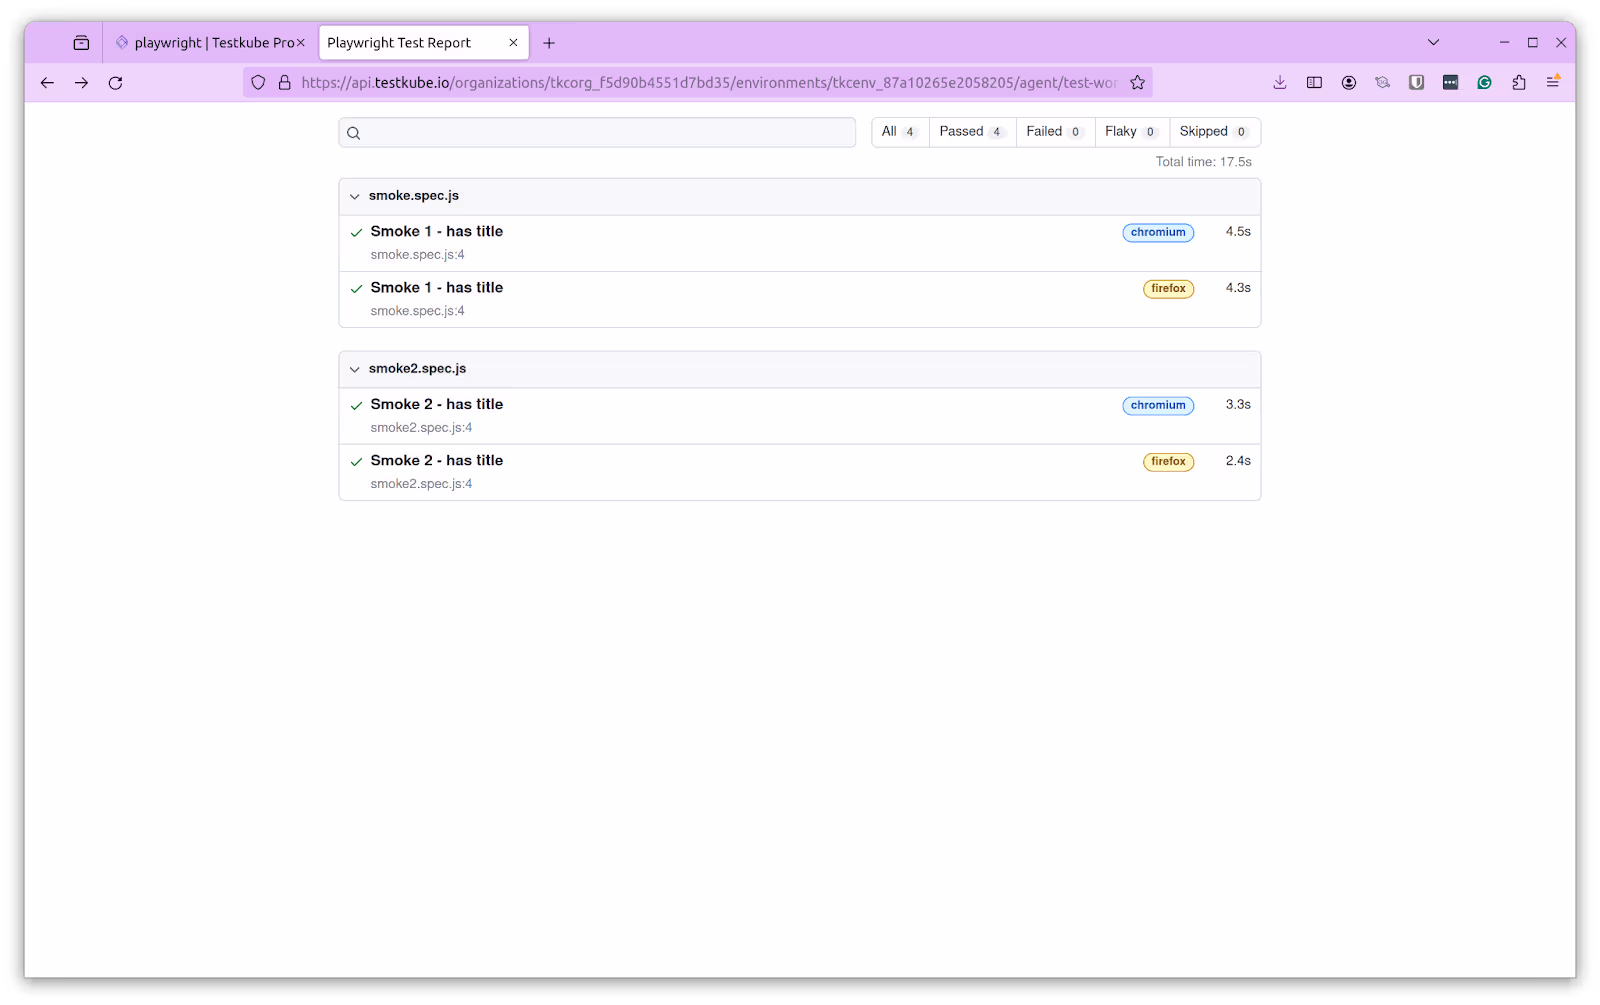
Once your Test Workflow is executed, you can examine the artifacts collected by Testkube that provide more details about the test. In this case, the Playwright test report is generated and captured by Testkube.
Using the Testkube CLI
If you want to run Test Workflows in KinD for your CI/CD pipeline, then using Testkube CLI is suitable. After configuring the environment on Testkube, you can install Testkube CLI to perform operations using CLI. Once you have configured Testkube CLI, you create a Test Workflow. We will create a Playwright Test Workflow using the following command:
testkube create testworkflow --name playwright --file playwright.yaml
We are using a Playwright.yaml file to create the Test Workflow. Run the Test Workflow after it is created.
testkube run testworkflow playwright -f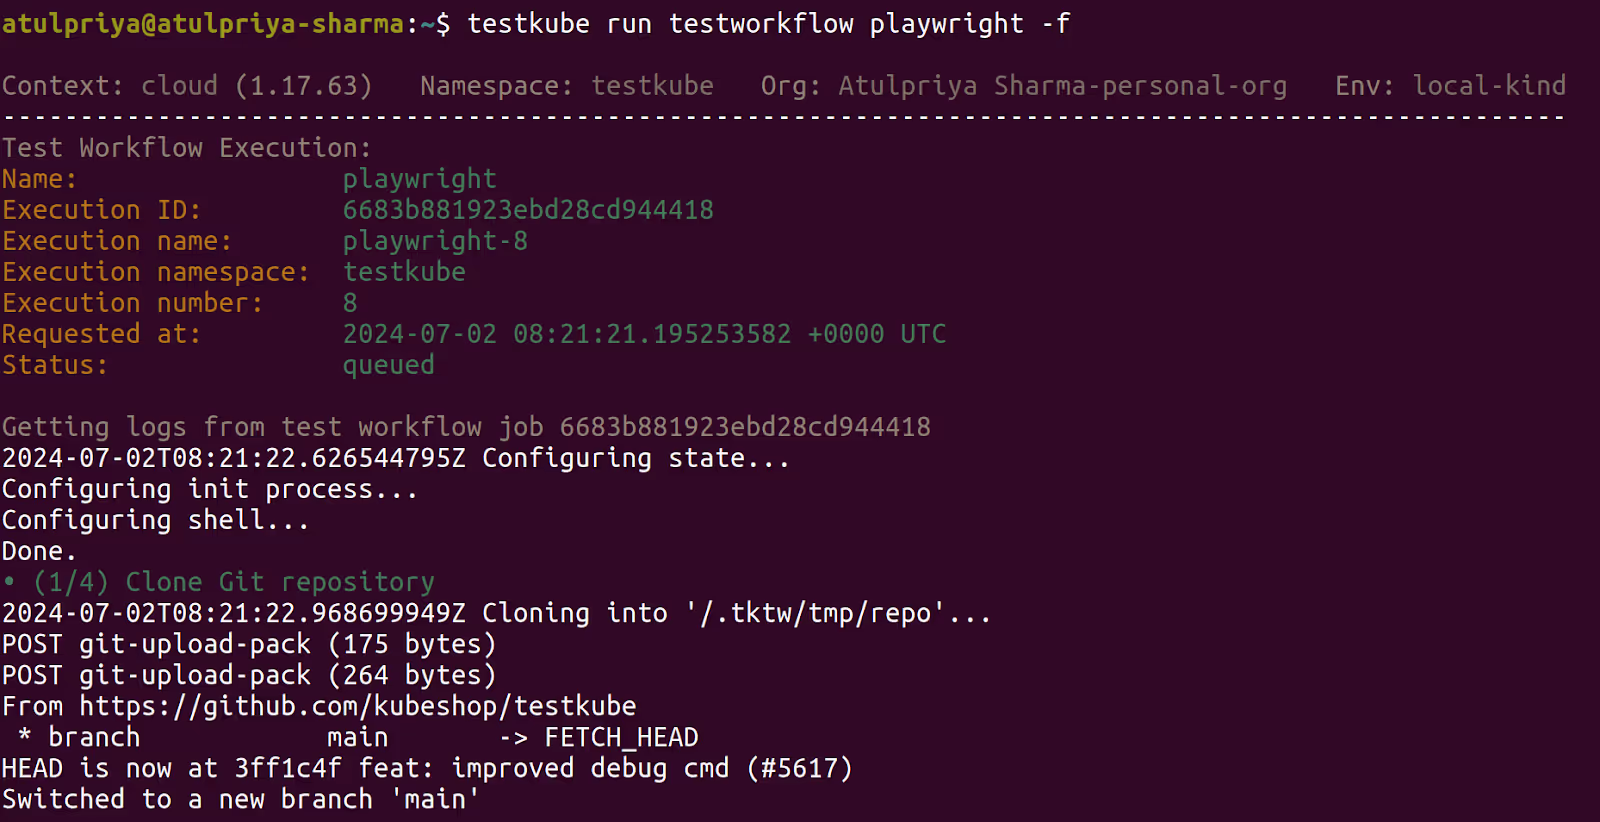
After executing the Test Workflow, you can get the results using the execution id from the previous command's output.
kubectl testkube get twe 6683b881923ebd28cd944418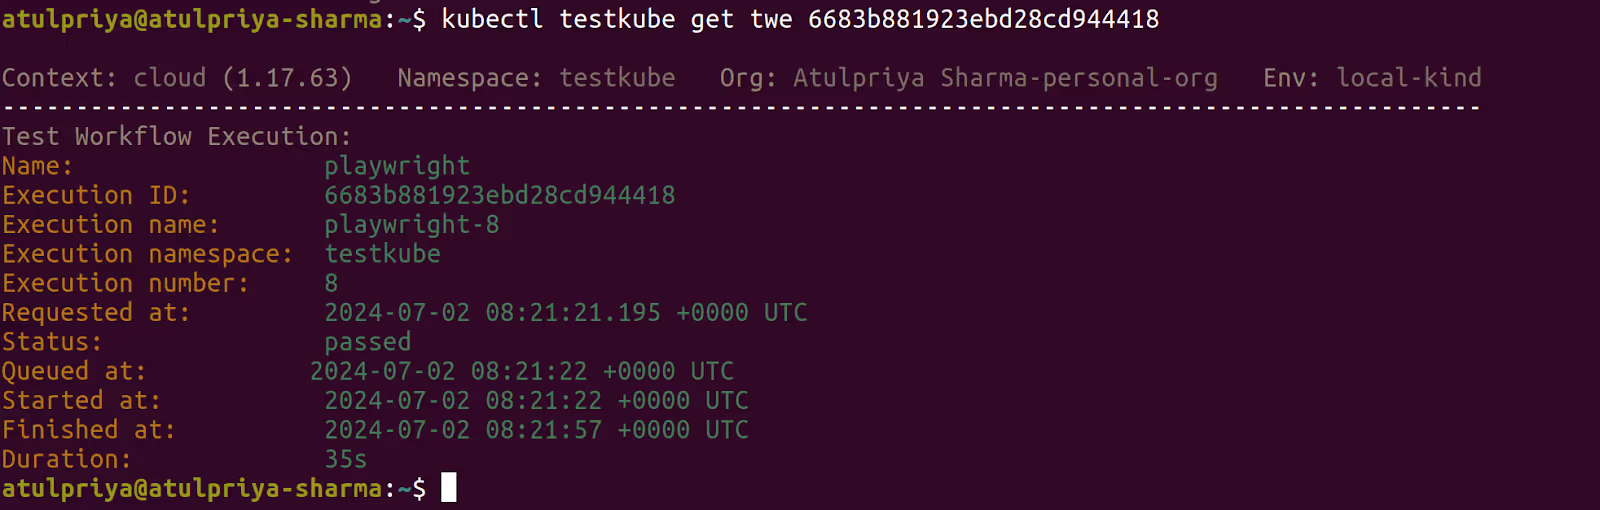
Similarly, you can create advanced Test Workflows from scratch for different testing tools and scenarios. We have detailed guides on creating Test Workflows for Cucumber, Rest Assured, and more in our blog.
Give it a go
Automating your Playwright tests in a cloud native way should be as easy as plugging your code into your existing Kubernetes cluster. Why not improve your testing process?
Sign up to Testkube and try one of our examples, or head over to our documentation. If you get stuck or have questions, we’re here to help! Reach out to us on Slack. We’re eager to hear how you use our integrations...!
About Testkube
Testkube is a cloud-native continuous testing platform for Kubernetes. It runs tests directly in your clusters, works with any CI/CD system, and supports every testing tool your team uses. By removing CI/CD bottlenecks, Testkube helps teams ship faster with confidence.
Explore the sandbox to see Testkube in action.

.png)
