
Table of Contents
Start your free trial.
Unlock Better Testing Workflows in Kubernetes — Try Testkube for Free

Unlock Better Testing Workflows in Kubernetes — Try Testkube for Free


Table of Contents
Executive Summary
Nowadays, the ability to quickly deploy, manage, and test applications is crucial for organizations of all sizes - and as they grow, it can get complicated to make all the pieces work together. Ensuring the quality of these systems when working with Kubernetes is challenging, but with Testkube, this process becomes simpler and more intuitive.
What is Testkube?
Testkube is a Kubernetes-native testing framework for testers and developers. It acts as an executor so that you could orchestrate, run, and display tests and test results for your code in a Kubernetes environment, letting you focus on testing without having to trouble yourself with infrastructure processes or your pipelines.
The best part? No matter what your testing tools and cloud provider of choice are, Testkube is fully adaptable and can be set up in a breeze. If you are using Amazon Web Services, this tutorial will show you how to deploy Testkube in EKS and expose it to the Internet with the AWS Load Balancer Controller.
Prerequisites
Firstly, we will need an existing Kubernetes cluster. Please see the official documentation on how to get started with an Amazon EKS cluster here.
Once the cluster is up and running we need to deploy the AWS Load Balancer Controller. For more information, see Installing the AWS Load Balancer Controller add-on.
Another important point is ExternalDNS. It is not compulsory to deploy it into your cluster, but it helps you dynamically manage your DNS records via k8s resources.
And last but not least - Testkube. You can get started with a free trial of Testkube Cloud. How to deploy Testkube to your cluster with all the necessary changes, please see the next section.
Ingress and Service Resources Configuration
To deploy and expose Testkube to the outside world, you will need to create two ingresses - Testkube's UI API and Testkube's dashboard. In this tutorial, we will be updating values.yaml that later will be passed to the Helm install command.
In order to use the AWS Load Balancer Controller we need to create a values.yaml file and add the following annotation to the Ingress resources:
annotations:
    kubernetes.io/ingress.class: alb
Once this annotation is added, Controller creates two ALBs and the necessary supporting AWS resources.
The example configuration using HTTPS protocol might look like the following:
Testkube UI API Ingress:
uiIngress:

 enabled: true

 annotations:

   kubernetes.io/ingress.class: alb

   alb.ingress.kubernetes.io/load-balancer-name: testkube-api

   alb.ingress.kubernetes.io/target-type: ip

   alb.ingress.kubernetes.io/backend-protocol: HTTP

   alb.ingress.kubernetes.io/listen-ports: '[{"HTTP": 80},{"HTTPS": 443}]'

   alb.ingress.kubernetes.io/scheme: internet-facing

   alb.ingress.kubernetes.io/healthcheck-path: "/health"

   alb.ingress.kubernetes.io/healthcheck-port: "8088"

   alb.ingress.kubernetes.io/ssl-redirect: '443'

   alb.ingress.kubernetes.io/certificate-arn: "arn:aws:acm:us-east-1:*******:certificate/*****"

 path: /results/v1

 hosts:

   - test-api.aws.testkube.io
Testkube Dashboard Ingress:
 ingress:

   enabled: true

   annotations:

      kubernetes.io/ingress.class: alb

      alb.ingress.kubernetes.io/load-balancer-name: testkube-dashboard

      alb.ingress.kubernetes.io/target-type: ip

      alb.ingress.kubernetes.io/backend-protocol: HTTP

      alb.ingress.kubernetes.io/listen-ports: '[{"HTTP": 80},{"HTTPS": 443}]'

      alb.ingress.kubernetes.io/scheme: internet-facing

      alb.ingress.kubernetes.io/healthcheck-path: "/"

      alb.ingress.kubernetes.io/healthcheck-port: "8080"

      alb.ingress.kubernetes.io/ssl-redirect: '443'

      alb.ingress.kubernetes.io/certificate-arn: "arn:aws:acm:us-east-1:****:*****"

path: /

   hosts:

     - test-dash.aws.testkube.io
Important!
Do not forget to add apiServerEndpoint to the values.yaml for testkube-dashboard, e.g.: apiServerEndpoint: "test-api.aws.testkube.io/results/v1"
Once we are ready with the values.yaml file, we can deploy Testkube into our cluster:
helm repo add testkube https://kubeshop.github.io/helm-chart

helm repo update

helm install --create-namespace testkube testkube/testkube --namespace testkube --values values.yaml
After the installation command is complete, you will see the following resources created into your AWS Console.
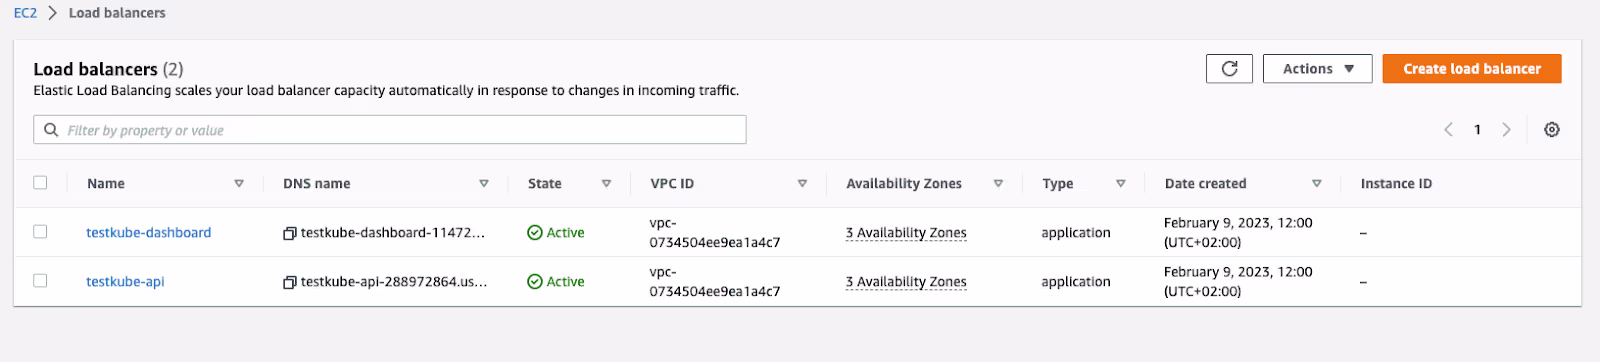

Please note that the annotations may vary, depending on your Load Balancer schema type, backend-protocols (you may use http only), target-type etc. However, this is the bare minimum that should be applied to your configuration.
Expose Testkube with Only One Load Balancer
The above configuration creates two Load Balancers - one for the Dashboard, another is for API. However, it is possible to save costs and use only 1 Balancer, thus you need to create only one Ingress manifest that will comprise configuration for both services:
apiVersion: networking.k8s.io/v1

kind: Ingress

metadata:

  name: testkube-ingress

  annotations:

    kubernetes.io/ingress.class: alb

    alb.ingress.kubernetes.io/load-balancer-name: testkube

    alb.ingress.kubernetes.io/target-type: ip

    alb.ingress.kubernetes.io/backend-protocol: HTTP

    alb.ingress.kubernetes.io/listen-ports: '[{"HTTP": 80},{"HTTPS": 443}]'

    alb.ingress.kubernetes.io/scheme: internet-facing

    alb.ingress.kubernetes.io/ssl-redirect: '443'

    alb.ingress.kubernetes.io/certificate-arn: "arn:aws:acm:us-east-1:*****:certificate/******"

spec:

  rules:

  - host: test-dash.aws.testkube.io

    http:

      paths:

        - path: /

          pathType: Prefix

          backend:

            service:

              name: testkube-dashboard

              port:

                number: 8080

  - host: test-api.aws.testkube.io

    http:

      paths:

        - path: /results/v1

          pathType: Prefix

          backend:

            service:

              name: testkube-api-server

              port:

                number: 8088
Except for Ingress annotation, you need to update Service manifests with a healthcheck configuration as well. Include the lines below into your values.yaml file.
Testkube Dashboard Service:
service:

 type: ClusterIP

 port: 8080

 annotations:

   alb.ingress.kubernetes.io/healthcheck-path: "/"

   alb.ingress.kubernetes.io/healthcheck-port: "8080"
Testkube API Service:
service:

 type: ClusterIP

 port: 8088

 annotations:

   alb.ingress.kubernetes.io/healthcheck-path: "/health"

   alb.ingress.kubernetes.io/healthcheck-port: "8088"
Important! Do not forget to add apiServerEndpoint to the values.yaml for testkube-dashboard, e.g.: apiServerEndpoint: "test-api.aws.testkube.io/results/v1"
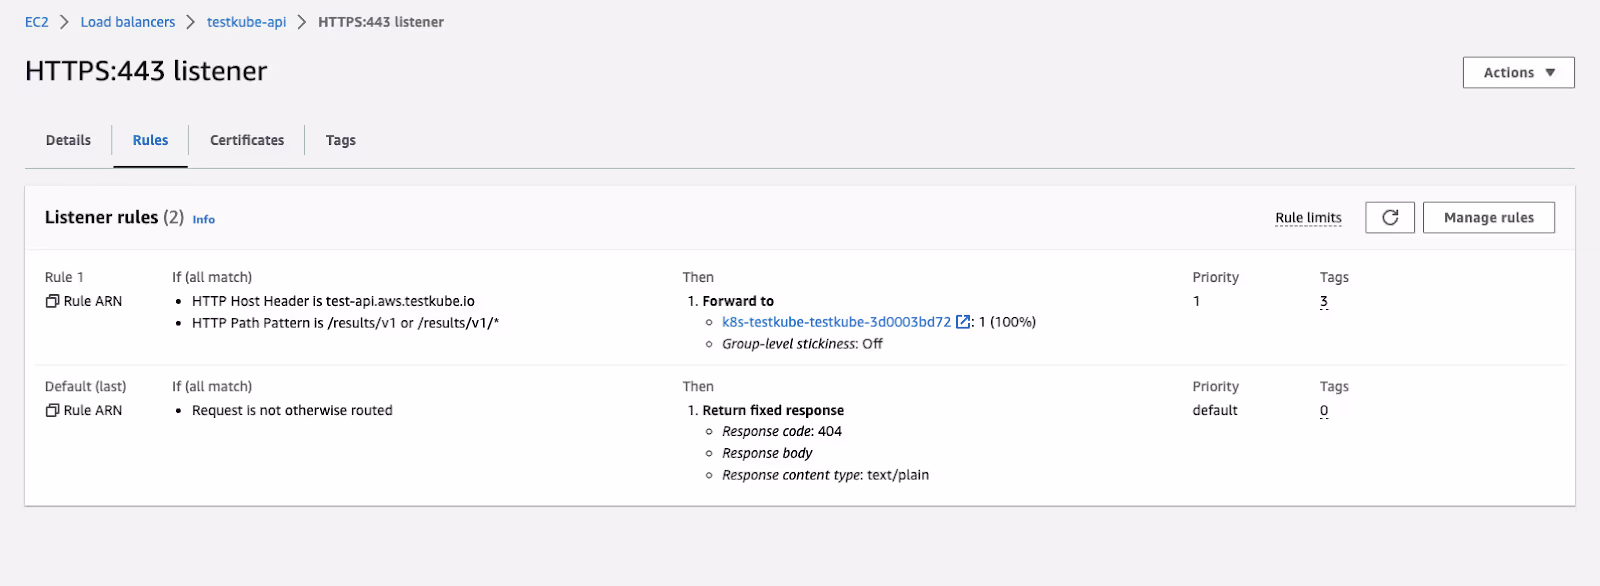
This way we will have 1 Load Balancer with two listener rules pointing on corresponding paths:


Give it a go!
So that’s it! With just a few changes you can deploy Testkube into EKS cluster and expose it to the outside world while all the necessary resources are created automatically. Give it a try and let us know about your thoughts. Your feedback is always appreciated.
Why not give it a go yourself? Sign up to Testkube and try one of our examples or head over to our documentation. If you get stuck—we’re here to help! Reach out to us on Slack. We’re eager to hear how you use our integrations...!
About Testkube
Testkube is the open testing platform for AI-driven engineering teams. It runs tests directly in your Kubernetes clusters, works with any CI/CD system, and supports every testing tool your team uses. By removing CI/CD bottlenecks, Testkube helps teams ship faster with confidence.
Get Started with a trial to see Testkube in action.
.png)