


Table of Contents
Start your free trial.
Unlock Better Testing Workflows in Kubernetes — Try Testkube for Free

Unlock Better Testing Workflows in Kubernetes — Try Testkube for Free


Table of Contents
Executive Summary
In today’s fast-paced software development world, non-functional aspects like performance are more important than ever, as they can determine whether a product succeeds or fails. Performance tests aim to understand the product's performance under specific loads and its limitations. Load testing highlights optimization opportunities and possible bottlenecks, while stress testing tells you points at which an application could break. Together, these tests boost confidence in the product's reliability and performance.
Different tools help developers and testers across the globe execute these types of tests, including JMeter - a tool for both testing functional behavior and gauging software performance. However, designing our actual performance tests with JMeter to answer specific questions and analyzing test results can be challenging, especially when Kubernetes is involved. Fortunately, Testkube simplifies this entire process.
Testkube is Kubernetes-native test execution framework for cloud native applications. It helps you orchestrate, run, and display tests and test results for your application in a Kubernetes environment.
Whether you're new to the K8s ecosystem or a seasoned pro, Testkube lets you focus on testing without having to complicate yourself, your processes, or your pipelines.
Why run JMeter Test in Testkube?
JMeter is widely known for its capacity to replicate loads and measure performance metrics across a wide range of services and applications. Running JMeter tests, particularly for large-scale Kubernetes native applications, can be time-consuming and challenging to manage if not executed correctly.
The integration of JMeter and Testkube enables the execution of performance tests in a highly scalable environment. Testkube is capable of deploying, scaling, and managing JMeter test plans, which results in efficient resource utilization and test orchestration.
Run JMeter Test with Testkube
To get started, you'll need to have Testkube running on your cluster. If you haven't already, sign up for free and get started right away—or read our installation Guide. Once you've set up Testkube, we can start creating running JMeter Tests using Testkube Workflows.
Prerequisites
- Get a Testkube account.
- Kubernetes cluster - we’re using a local Minikube cluster.
- Testkube Agent configured on the cluster.
Once the prerequisites are met, you can launch a target Kubernetes cluster with a configured Testkube agent.
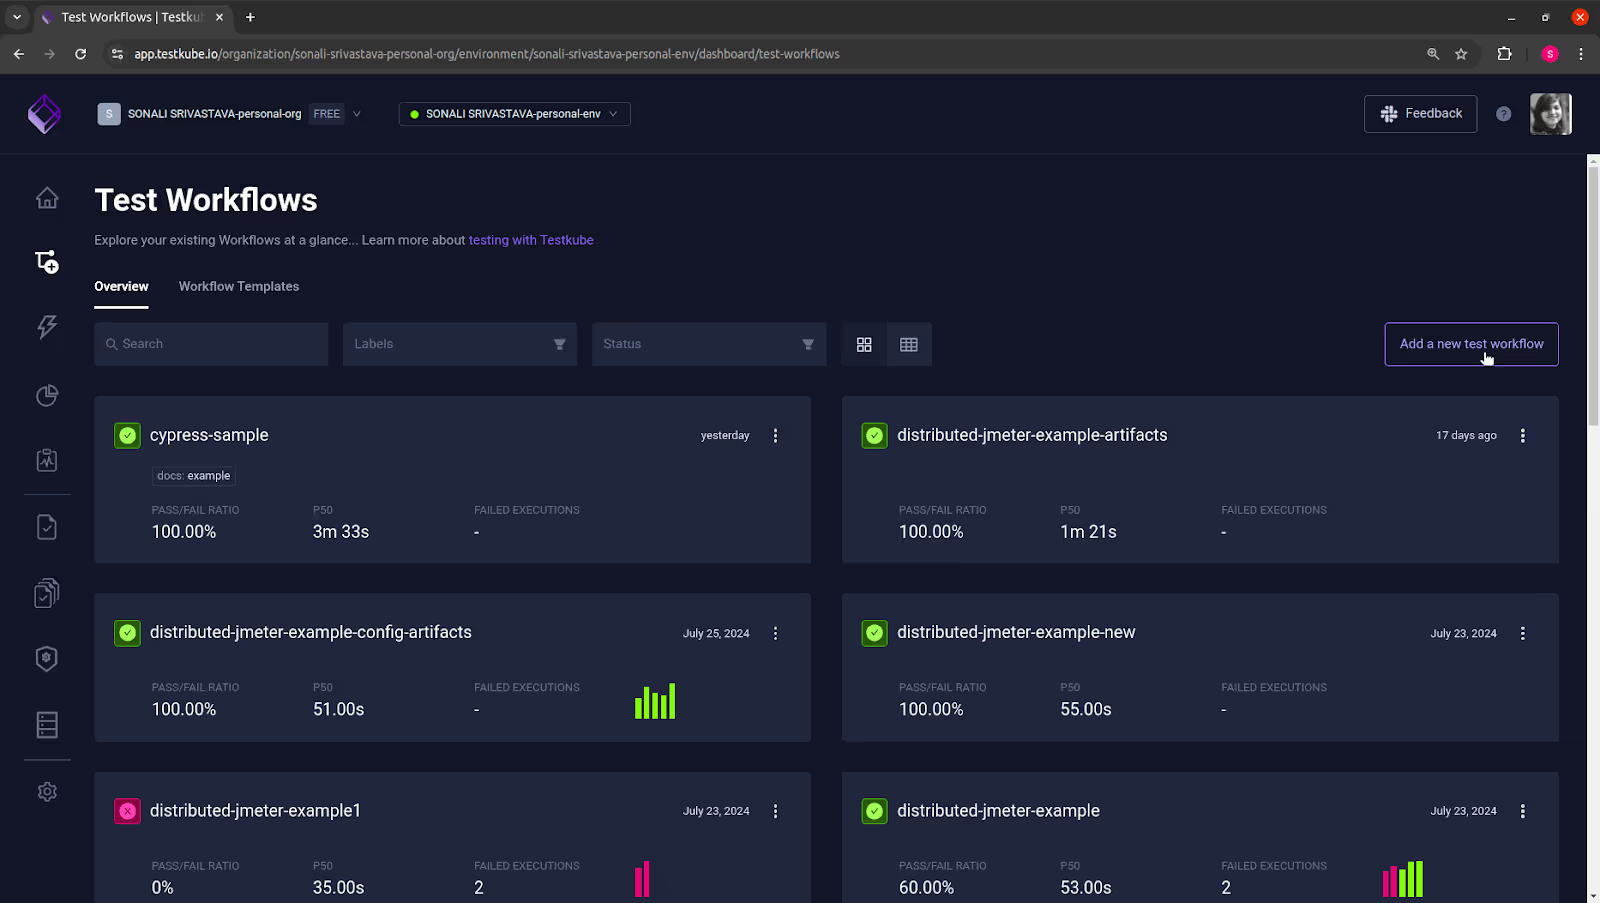
Creating a Test Workflow
Using an existing example is the simplest way to create a Test Workflow on the Testkube dashboard. Testkube includes pre-built test workflows for k6, PlayWright, Cypress, and other tools.
We'll go over how to set up and understand a JMeter Test Workflow here.
Navigate to the test workflow section and click the “Add New Test Workflow” button.
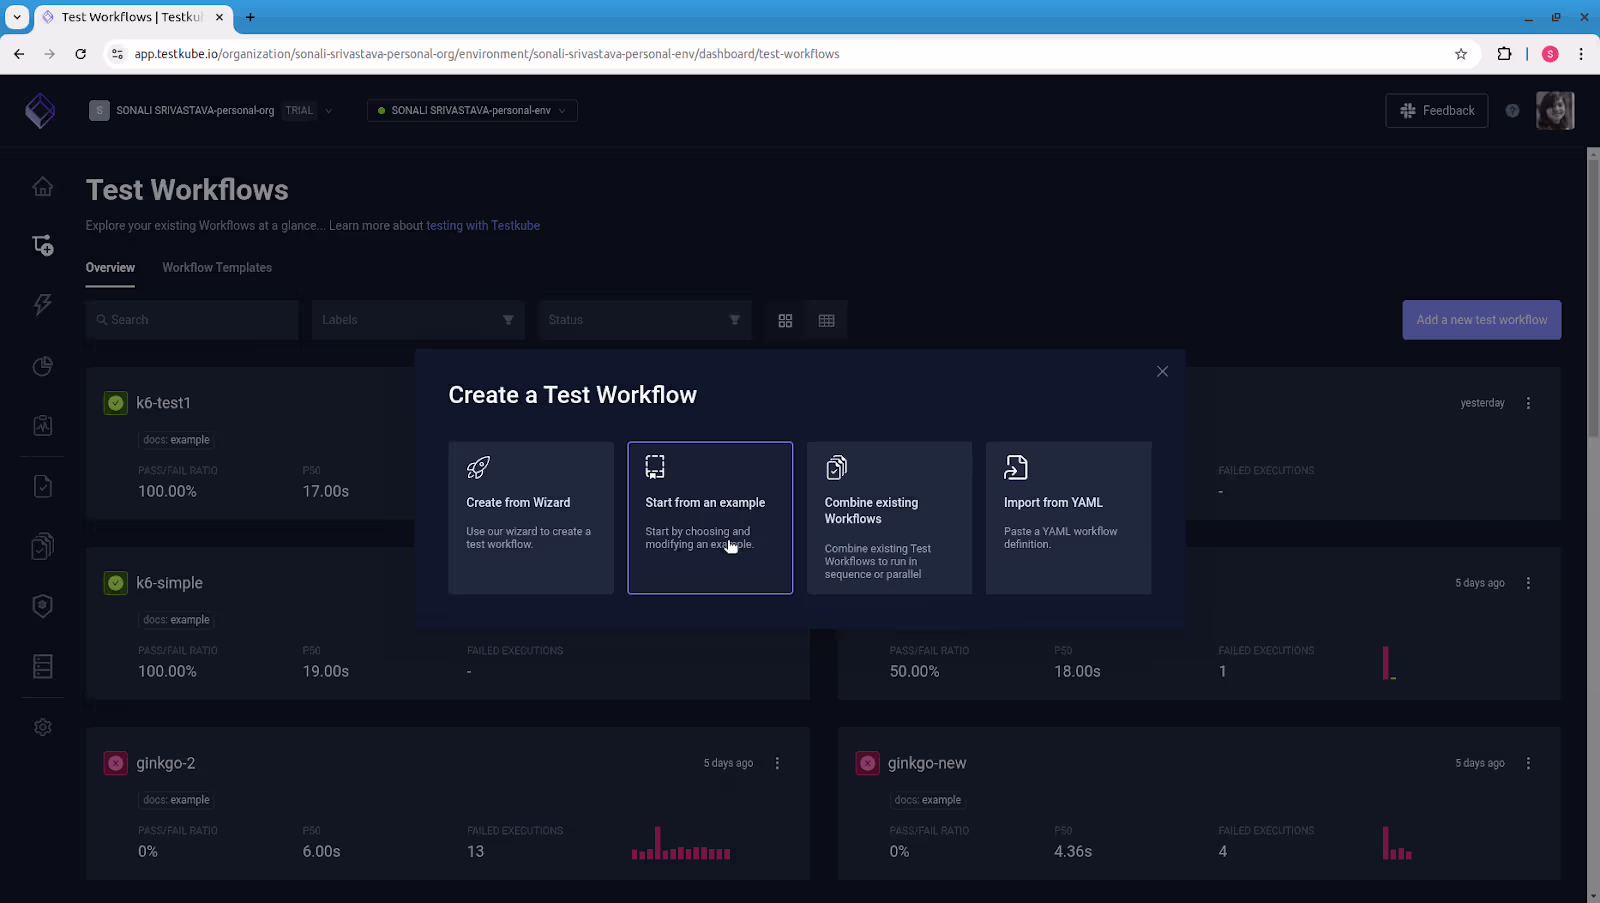
A “Create a Test Workflow” dialog box appears that provides you with four options to create a Test Workflow:
- Create from Wizard: This option displays a dialog box prompting you to create a new Test Workflow.
- Start from an Example: This configuration enables the use of pre-configured examples, including Cypress, Playwright, Postman, Playwright, k6, and many others.
- Combine Existing Workflows: By selecting this option, you can sequentially or simultaneously execute and combine multiple existing Test Workflows.
- Import a Workflow from YAML: Using this option, you can import a Test Workflow from a YAML definition.
Choose the “Start from an Example” option to create this workflow.
A new dialog box displays, with a list of test tools to select from. We will use "JMeter" for creating this Test Workflow.
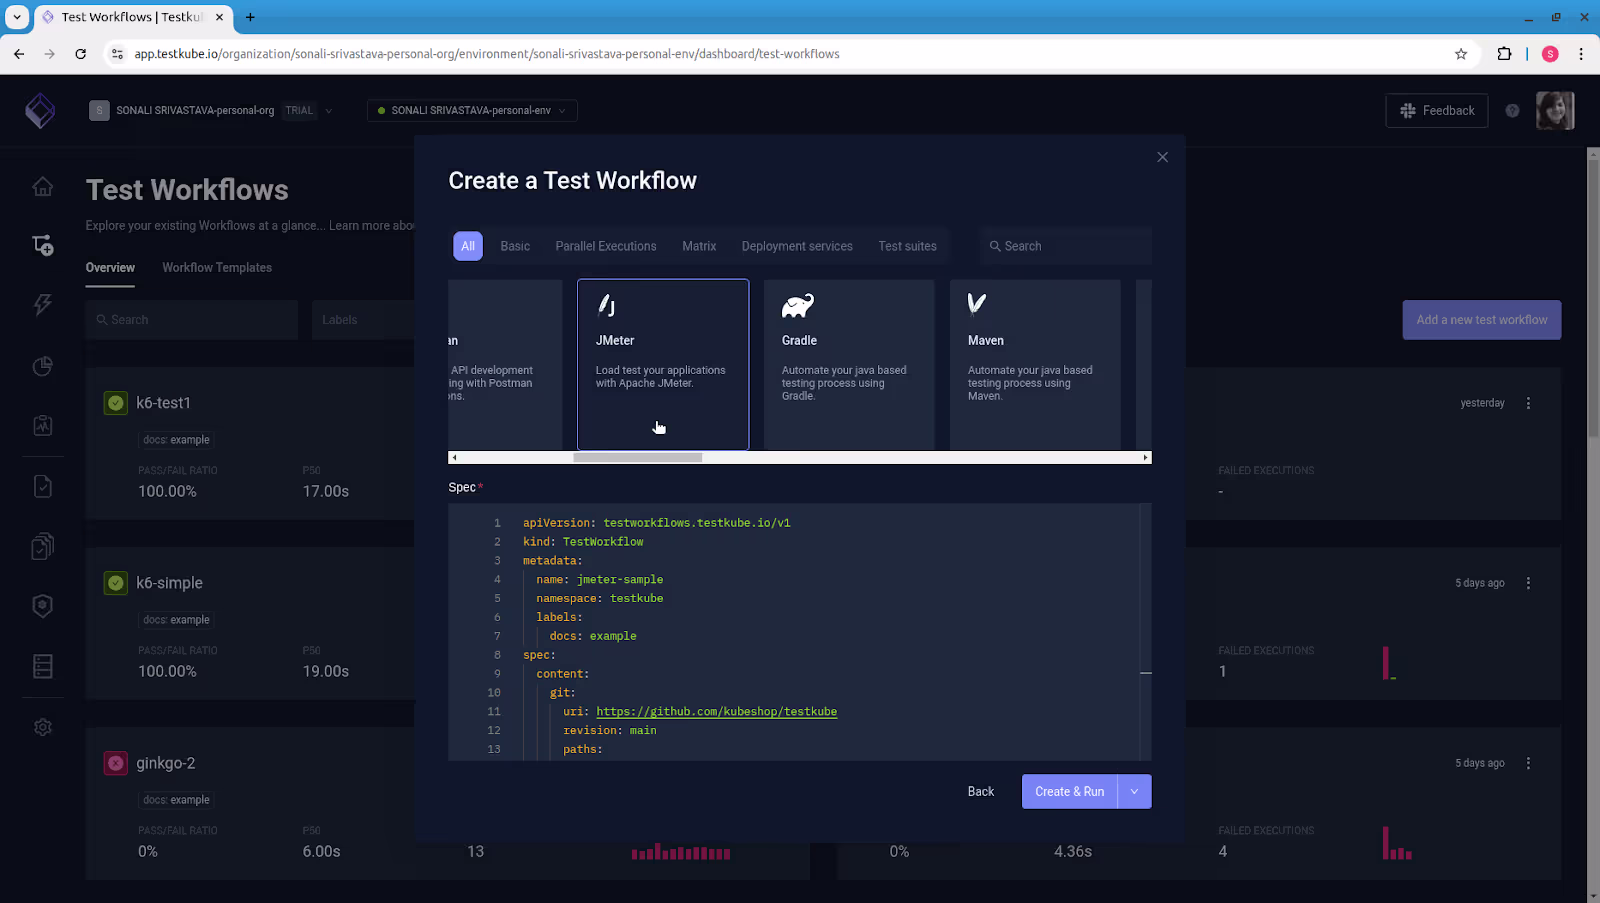
To create and execute the Test Workflow, select the "Create & Run" option.
Executing the Test Workflow
After clicking the "Create & Run" button, the Test Workflow will start.

To view real-time progress and logs, click on each test step. You can view a detailed log of test execution.
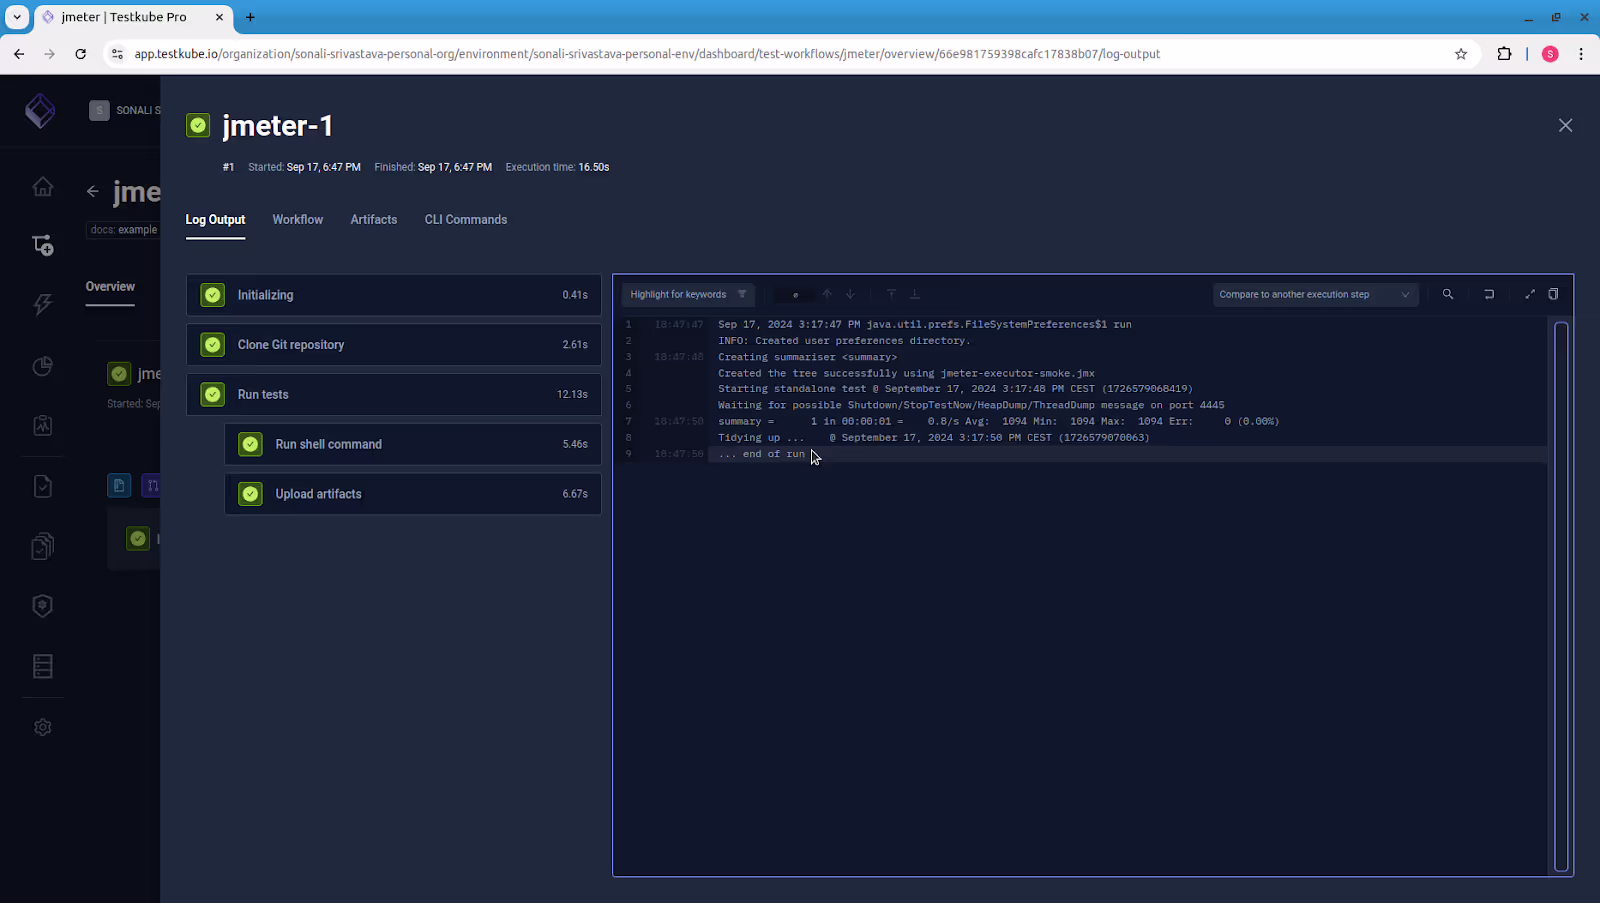
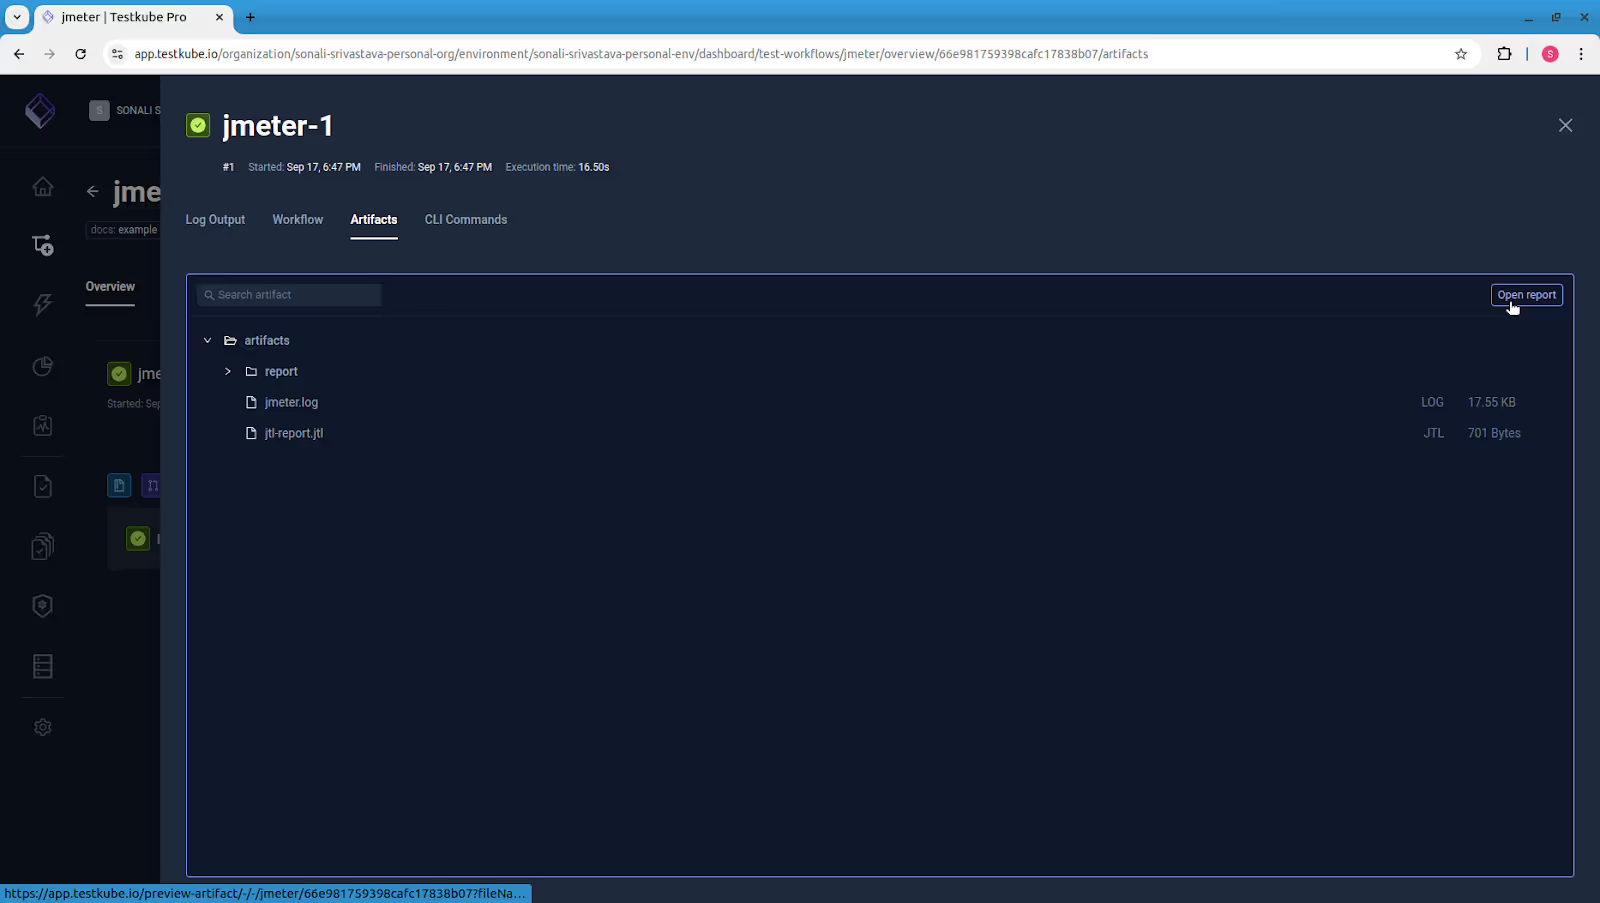
Testkube collects all artifacts after execution, including a stats report with all of the outputs and results.
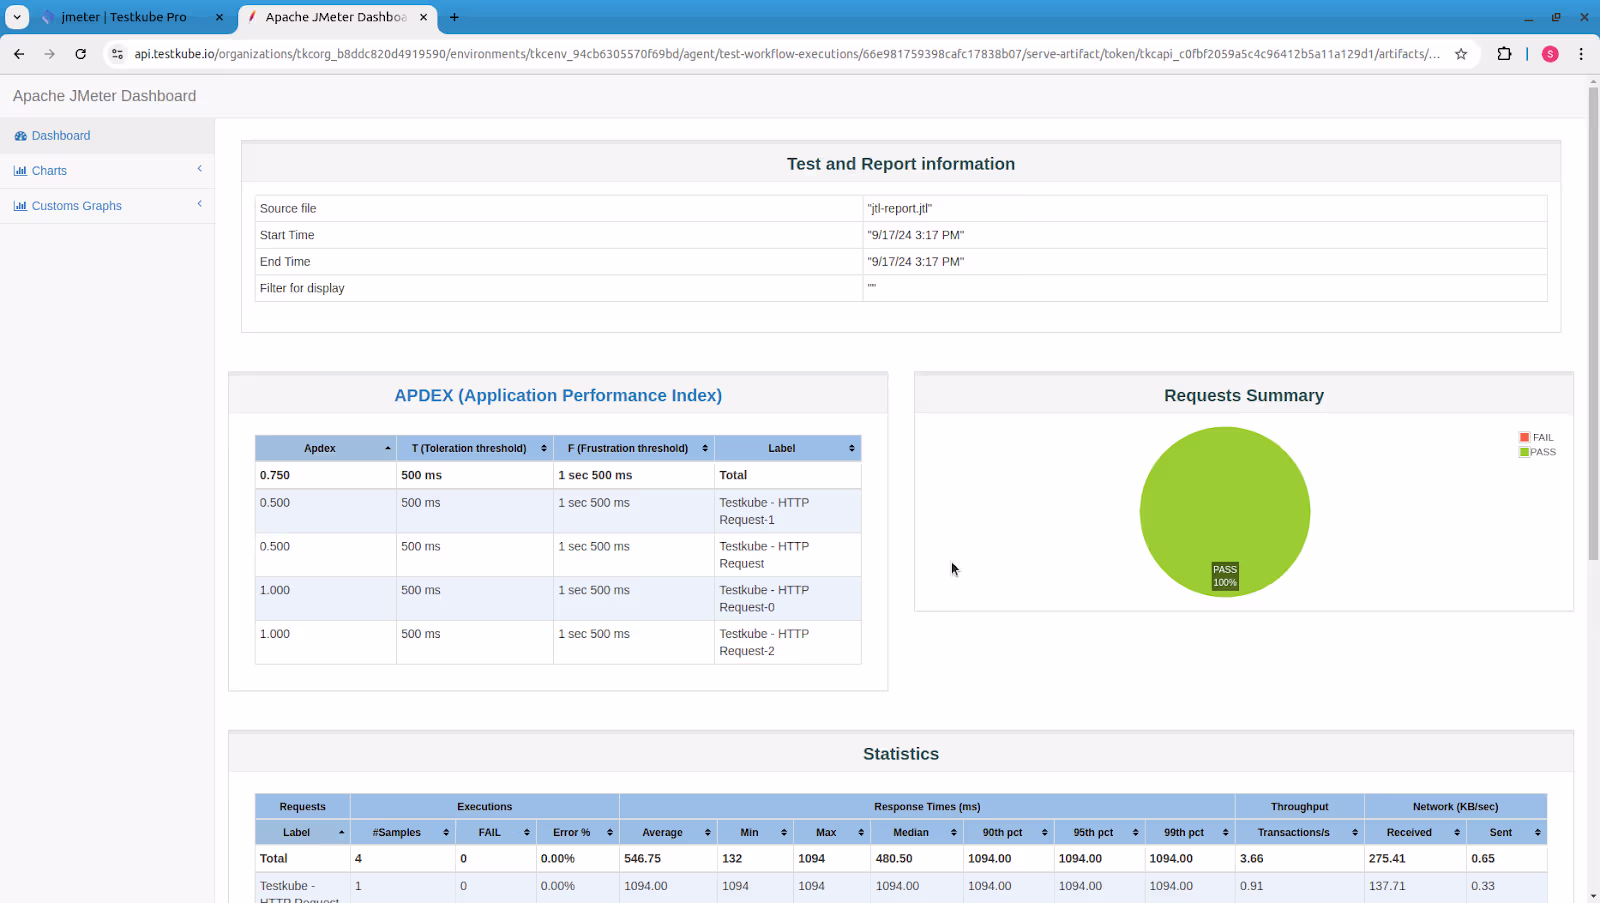
Select "Artifacts” and click the "Open report" option to view the detailed test report, which includes more visual and summary insights.
Testkube loads the report that displays basic information about the JMeter test execution results. It offers detailed statistics and errors (if any) in the test's performance.
This was a simple demonstration of how to use Test Workflows in Kubernetes testing. To make the most of Test Workflows, you can create complex workflows or import custom workflows into Testkube.
Understanding the JMeter Testing Workflow File
Let's look at the JMeterTest Workflow that was used to set up and execute this test:
kind: TestWorkflow
apiVersion: testworkflows.testkube.io/v1
metadata:
  name: jmeter
  namespace: testkube
  labels:
    docs: example
spec:
  content:
    git:
      uri: https://github.com/kubeshop/testkube
      revision: main
      paths:
      - test/jmeter/executor-tests/jmeter-executor-smoke.jmx
  container:
    workingDir: /data/repo/test/jmeter/executor-tests
  steps:
  - name: Run tests
    container:
      image: justb4/jmeter:5.5
    shell: jmeter -n -t jmeter-executor-smoke.jmx -j /data/artifacts/jmeter.log -o
      /data/artifacts/report -l /data/artifacts/jtl-report.jtl -e
    artifacts:
      paths:
      - /data/artifacts/**/*
status: {}
The spec file includes the following components:
- The `spec.content` contains a list of the test file's source, location, and path. Here, it indicates that a Git repository with the test files will be used to retrieve the test content. The repository branch to pull files from (in this case, the main branch) as well as the path within the repository to the JMeter test file (.jmx file) to be used for the test.
- The `spec.steps` specifies the actions that the workflow will perform. It contains the name, shell, container, and artifacts of the test that will be executed as part of the test workflow. In this scenario, the Docker container image "justb4/jmeter:5.5" was used to perform the JMeter tests, which were executed using a shell command within the container.
Read our Test Workflow documentation to understand more about the Test Workflow specification.
Summary
While JMeter's powerful performance feature makes it possible to analyze an application's performance under different load test scenarios and to organize test cases, combining this tool with Testkube facilitates performance testing in contemporary cloud-native environments. You can run large load tests efficiently with Testkube’s powerful test orchestration and management capabilities. So, if you are building a new test or initiating an existing one, using JMeter with Testkube will give you the ability to do effective performance testing, ensuring that your application works seamlessly.
Why not check it out yourself? Get started with Testkube and JMeter to run tests efficiently in Kubernetes. If you get stuck or have questions, reach out to us on Slack. We’re here to help. We're also eager to hear how you use our integrations!
About Testkube
Testkube is the open testing platform for AI-driven engineering teams. It runs tests directly in your Kubernetes clusters, works with any CI/CD system, and supports every testing tool your team uses. By removing CI/CD bottlenecks, Testkube helps teams ship faster with confidence.
Get Started with a trial to see Testkube in action.

.png)
