Table of Contents
Start your free trial.
Start your free trial.

Start your free trial.


Table of Contents
Executive Summary
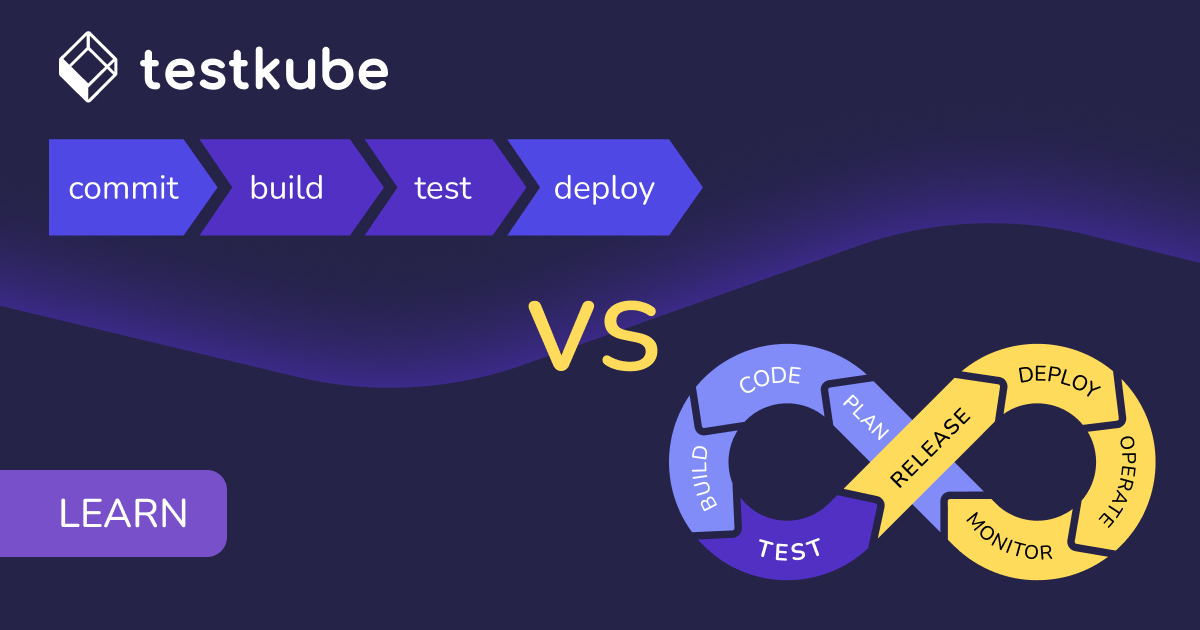
Continuous Integration and Continuous Delivery (CI/CD) are transformative methodologies that have redefined how software is developed and delivered. These are the game-changing processes that automate code integration, testing, and deployment, streamlining workflows, enhancing software development lifecycles, and maintaining their quality.
Testing is a critical part of any CI/CD pipeline as it ensures software quality. Most modern CI/CD tools allow you to configure testing tools within your pipeline. Jenkins is one of the most popular open-source CI/CD tools, playing a vital role in orchestrating your entire pipeline—from code integration and testing to deployment and monitoring.
In this blog post, we delve into CI/CD and testing. We will explore the potential of Jenkins and Testkube to optimize and automate the testing process within the CI/CD pipeline, thereby facilitating the process of setting, building, testing, and deploying.
What is Testkube?
Testkube is a cloud native testing framework designed to execute and orchestrate your testing workflows inside your Kubernetes clusters. It allows you to bring your chosen testing tool to run all types of tests, integrate them out of the box, and schedule them from within your cluster while providing all the visibility into your tests and flexibility when building and executing these tests from your CI/CD processes.
Challenges with Testing in Traditional Jenkins Pipeline
Jenkins facilitates the creation of a well-defined CI/CD pipeline, ensuring order and efficiency throughout the software development process. With Jenkins, you can seamlessly integrate version control tools like GitHub, GitLab, etc., making your codebase organized and accessible.
Setting up CI/CD pipelines with Jenkins or any other tool is critical in modern software development, but integrating testing tools within these pipelines presents several complexities. The challenge arises from diverse testing requirements, the need for careful tool selection, managing versions and environments, orchestrating parallel test execution, and efficient test data management.
Let’s dive into some of these challenges in more detail, and show how Testkube helps you overcome them:
Scalability Limitations
Though Jenkins supports parallelization, it is not inherently designed for scaling tests. Trying to do so could often lead to performance bottlenecks as demand increases. This can result in slow builds, making it difficult for organizations to scale effectively and manage compute resources.
A solution like Testkube enhances scalability by leveraging Kubernetes' orchestration capabilities, allowing for dynamic resource allocation and the ability to run tests in parallel across multiple nodes. This enables teams to efficiently manage increased workloads without compromising performance.
Complex Maintenance
Maintaining test executions at scale in a Jenkins environment can become complex due to the extensive use of plugins and required scripting to make them work with your pipelines. Also, you need to ensure your test is running with the latest version of the testing framework.
Testkube simplifies maintenance by providing a more streamlined integration with testing tools, reducing the reliance on numerous plugins and allowing teams to focus on core functionalities without being bogged down by intricate configurations.
Test execution tightly coupled to Jenkins
In traditional setups, test execution is closely tied to Jenkins, making it challenging to adapt or switch testing frameworks without significant reconfiguration. This tight coupling limits flexibility and innovation.
Testkube decouples test execution from Jenkins, allowing teams to integrate various testing tools like k6 independently. This flexibility enables organizations to adopt new testing methodologies easily without disrupting existing CI/CD processes. Also, it gives the capability to migrate to different CI/CD tools like ArgoCD to align easily with GitOps workflow.
Insufficient Reporting and Troubleshooting Capabilities
Jenkins lacks test reporting features and user-friendly secure troubleshooting interfaces, making it difficult for teams to analyze test results or diagnose issues efficiently.
Testkube addresses this by providing a modern user interface that facilitates easier troubleshooting and long term test reporting, enabling teams to quickly identify and resolve issues, thus improving overall software quality.
By integrating Testkube with Jenkins, organizations can overcome these challenges, creating a more robust and flexible CI/CD pipeline that enhances both testing efficiency and software quality.
Testkube and CI/CD Pipelines
Creating testing workflows within CI/CD pipelines can be a daunting task, given the number of steps and configurations involved. With numerous components and dependencies, these pipelines often grow complex, making it difficult to visualize and manage the entire process effectively. However, the transition becomes remarkably straightforward with Testkube.
Testkube offers seamless integration with a variety of testing frameworks, streamlining the entire process and making it effortlessly efficient. This also provides better separation between CI/CD and the testing process.
This means that, as a user, the experience of setting up Postman in a CI/CD pipeline using Testkube is the same as setting up K6 on Testkube, thus ensuring consistency in integration across all tools.
Using Testkube in Jenkins
To understand how to use Testkube in Jenkins, let’s look at a simple use case where we will showcase the power of this integration. We’ll configure Jenkins to run a k6 test in Testkube when a new PR is opened in a particular repo.
Internally it will execute a Testkube test workflow that we have created for performance testing an application using k6. Based on the results of the execution, the result will be shared back into the PR to the developer or team.
Let’s see how the integration of Testkube with Jenkins works.
Prerequisites
- Get a Testkube account.
- Kubernetes cluster with Testkube configured—we’re using an EKS cluster. Refer to the Testkube installation docs to install Testkube.
- Install Jenkins
- Install Testkube CLI
- Configure Testkube API token, Org ID, and Environment ID: Available in Testkube Dashboard -> Settings
We are going to use a sample application to run our tests against this repo. This has a k6 test which we will use for performing testing.
For this implementation to work, you need to configure Testkube, Jenkins, and GitHub.
Configuring GitHub
Configure your GitHub repository that has your tests to communicate with your Jenkins instance. This will enable GitHub to send events like the opening of a PR to Jenkins and allow Jenkins to return the test status to GitHub.
Start by creating a Personal Access Token (PAT) for your account. This will be used while configuring Jenkins.
The next step is to configure a webhook for your repository. This is required for GitHub to send events to your Jenkins instance. For instance, opening a PR is an event, so after creating a webhook, GitHub will be able to send PR open events to Jenkins.
To do that, navigate to your Project Settings and click WebHooks. Tap on New to create a new webhook. Enter your Jenkins URL under the Payload URL as shown below.

Make sure to also select the Pull Request event under the section, “Which events would you like to trigger this webhook?” or you can choose “Send me everything”.
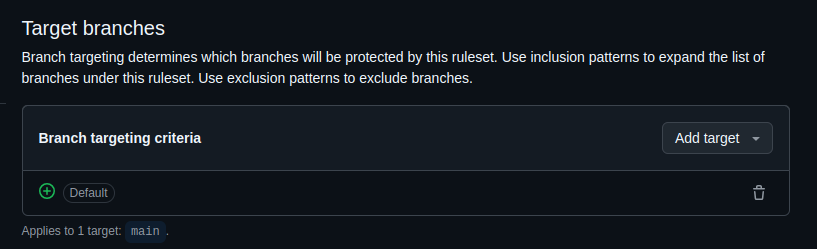
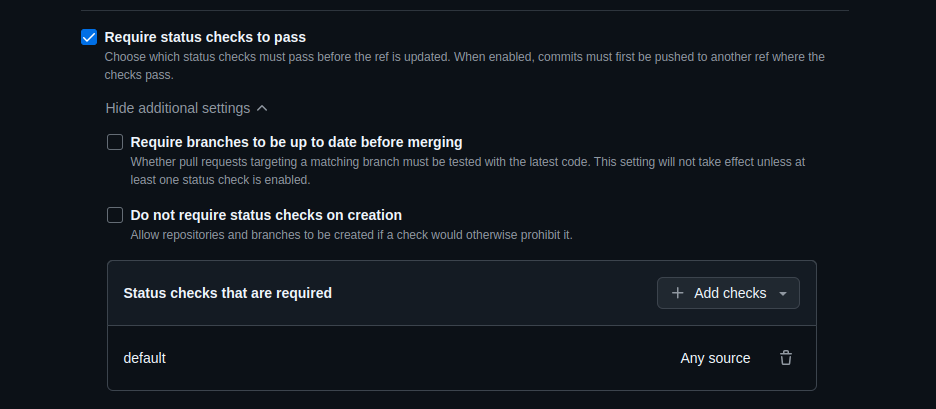
The next step is to configure the repo commit status so that it disables the merge option until the CI pipeline runs. Navigate to Repo -> Settings -> Branches -> Branch Protection Rule and enable Require status checks to pass before merging.
Upon saving this, you have successfully configured your GitHub repository to communicate with your Jenkins instance. Let’s now shift our focus to configuring Jenkins.
Configure Testkube: Creating a Test Workflow
Log in to the Testkube account. Navigate to the Test Workflows tab on the Testkube Dashboard and click on “Add a new test workflow”.
This will provide you with four options:
- Create from Wizard - use the wizard to create a Test Workflow.
- Start from an example - use existing k6, cypress, and playwright examples
- Combine existing workflows - use with existing workflows.
- Import from YAML - import your own Test Workflow.
We’ll choose the “Import from YAML” option to create a workflow with the following configuration.
kind: TestWorkflow
apiVersion: testworkflows.testkube.io/v1
metadata:
  name: k6-testkube-1
  namespace: testkube
  labels:
    docs: example
spec:
  content:
    git:
      uri: https://github.com/cerebro1/k6-test/
      paths:
        - get.js
  steps:
    - name: Run Tests
      workingDir: /data
      run:
        image: grafana/k6:0.49.0
        env:
          - name: K6_WEB_DASHBOARD
            value: 'true'
          - name: K6_WEB_DASHBOARD_EXPORT
            value: k6-test-report.html
        args:
          - run
          - /data/repo/get.js
      artifacts:
        paths:
          - k6-test-report.html
In this configuration, we have provided the `git.uri` to the repository that has the test and set `git.paths` as the test file path. In the `steps`, we have defined the k6 image to be used, the command to execute the test, and a path to store test artifacts. This is how it looks in the Testkube Dashboard.

Select the "Create” option from the dropdown to create the Test Workflow.

The Test Workflow with the name “k6-testkube-1” is created in the Testkube Dashboard which has the configuration to run the k6 test.
Configure Testkube API token
To allow Jenkins to communicate with Testkube, we will make use of Testkube CLI. The following Testkube command will set the context with which you can trigger the Test Workflow execution in your Jenkins Pipeline Script.
testkube set context --org-id MY_ORG_ID --env-id MY_ENV_ID -c cloud -k MY_API_KEYThese details are available in Testkube Dashboard-> Settings. We have created a Testkube API token with a week expiration date. We need to add this token in Jenkins to allow the Testkube CLI command execution.
Configuring Jenkins
Login to your Jenkins account and configure Jenkins to connect to the GitHub repository.
- Click on Manage Jenkins -> Plugins and enable the following plugins:some text
- GitHub Pull Request Builder
- Docker
- Git
- Pipeline
- Click on Manage Jenkins -> Credentials and create a new credential of ‘Secret text’ Kind and add the PAT in Secret. Provide a unique ID and save. This will allow connection to GitHub repository.
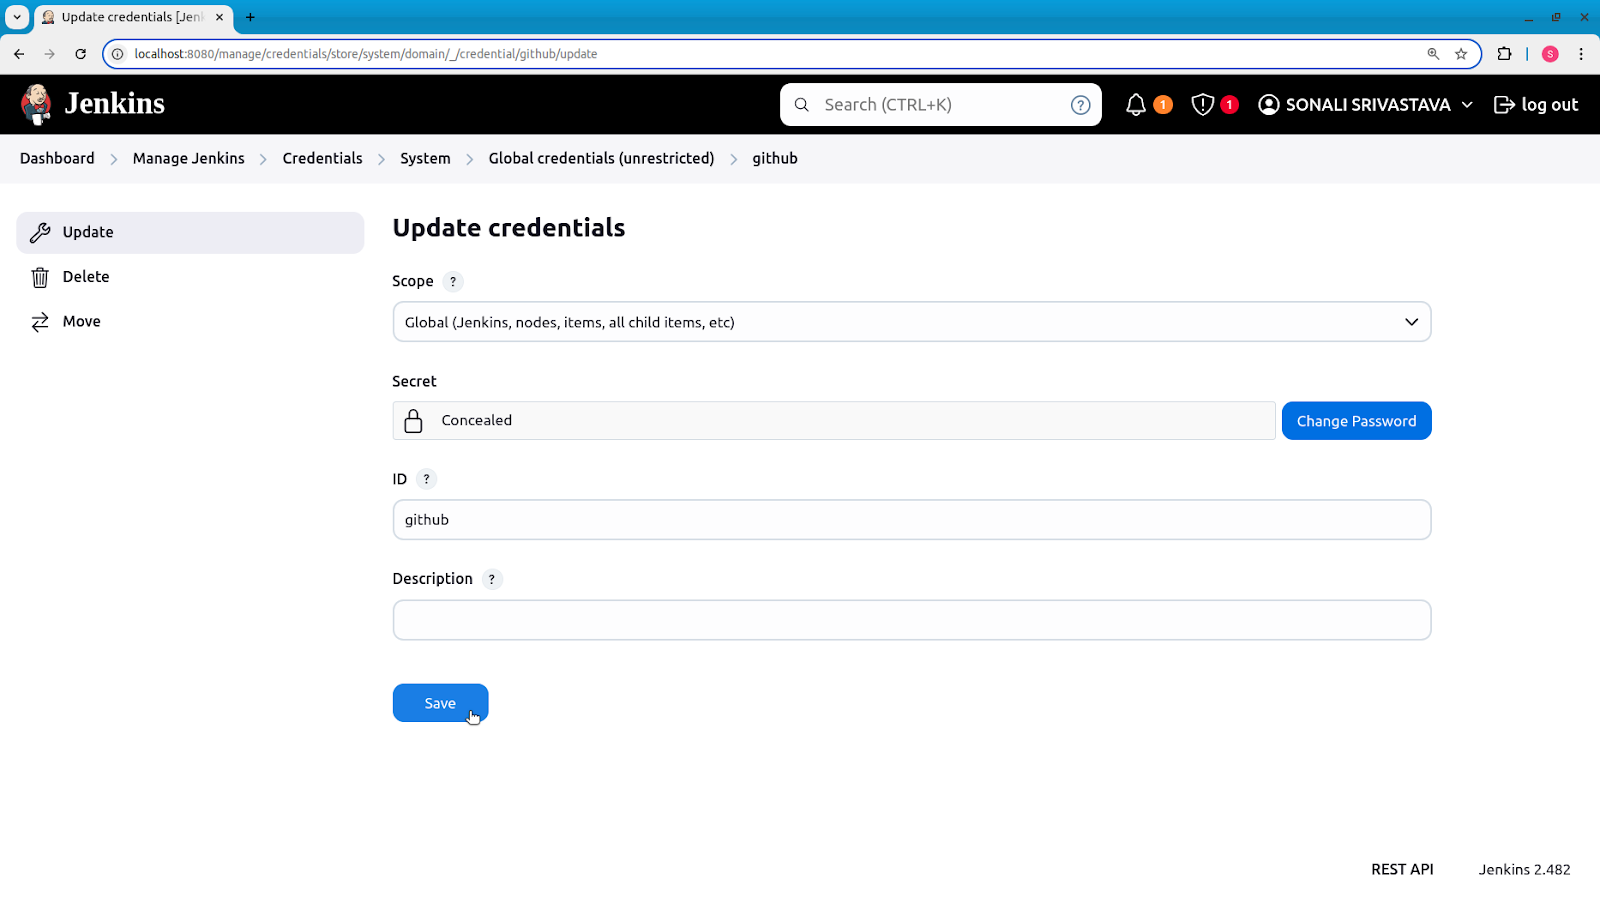
- Select Manage Jenkins->Credentials and add a new credential of “Secret text” Kind as shown below with the Testkube API token. This will allow connection to Testkube account.

- Click on Manage Jenkins -> System and enter values in the GitHub pull request builder. Select the credentials for PAT and test that Jenkins is able to communicate with GitHub via API using the test credentials option. Save and Apply the changes.

If the connection is successful, the next step is to configure a Jenkins Pipeline that will use Testkube CLI to trigger the Test Workflow in Testkube.
Create Jenkins Pipeline
You can create a pipeline using the CLI or through the UI. We have created it through the UI.
- Create a new pipeline in Jenkins and provide a name.

- Enter your repo URL in the GitHub project.

- Navigate to the Build Triggers section and select GitHub Pull Request Builder to configure GitHub API credentials as defined in the System configuration while configuring Jenkins.
- Navigate to the Advanced section of GitHub Pull Request Builder and select the following options :some text
4a. Closing failed PR.

4b. Automatic build of PR.

- In the pipeline option, select Pipeline Script and then enter the following Groovy script:
pipeline {
    agent any

    environment {
        TK_ORG = 'tkcorg_xxxxxxxxxxxxxxxx'
        TK_ENV = 'tkcenv_xxxxxxxxxxxxxxxx'
        TK_API_KEY = credentials("TK_API_KEY")
    }
    stages {
        stage('Testing') {
            steps {
                script {
                    sh 'testkube set context --api-key $TK_API_KEY --org-id $TK_ORG --env-id $TK_ENV'
                    // Run k6-local
                    sh 'testkube run testworkflow k6-testkube-1 -f'
                }
            }
        }
    }
}
Here we have provided two commands in the `steps.script`:
- Set the Testkube CLI context
- Run the Test Workflow with name “k6-testkube-1”. Here we have passed “-f” that will ensure that the pipeline has the complete details of the test execution and it can then accordingly push the status to the PR in GitHub of the test repository.
Replace environment variables with details specified in your Testkube Dashboard.
- Click on Save and Apply.
Create a PR and Trigger k6 Test
With this, we have successfully configured Jenkins with the k6 test and the GitHub repository. Let us see how this integration works.
- Raise a PR in the configured repository to see the k6 test execution with Jenkins.

As soon as the PR is raised, the Jenkins pipeline is triggered.
- Head over to Jenkins UI and you will see the pipeline execution.

- Select the Console Output to view the details.

You can see in the above screenshot Jenkins is integrated with Testkube and the Test Workflow is in execution.
- In the console output, you can view the status of the k6 test execution using logs as shown below.

This seems way to complex to gain some insights to test and though Jenkins did automate the triggering of workflow when PR is raised, it is unable to provide us feature to gain insights or troubleshoot the test.
- Let us navigate to the Testkube Dashboard the access the Test Workflow we created.

Here you can get a clear picture of what happened with the test and whether the artifacts were uploaded or not.
- Select the “Run” to view the test execution details.

- View the artifacts using the Artifacts tab.

- Click on the HTML file to directly view the artifacts.

In the above screenshot, you can see that the test has successfully passed. The status will be updated in the pull request, and it will allow the developer to merge the pull request. You can configure branch protection rules in the respective repo to take appropriate actions based on your requirements.

That’s how you can integrate Testkube with Jenkins and run your test as part of your CI/CD pipeline. You can configure the pipeline and Jenkins with further advanced configurations and utilize Testkube to suit your requirements.
Summary
In this blog post, we saw that the challenges in setting up complex testing workflows within CI/CD pipelines are time-consuming and complex. However, Testkube offers a refreshing perspective, where the integration of testing tools in a CI/CD pipeline becomes a seamless process. By providing standardized configurations and the flexibility to bring your preferred test tools into the fold, it simplifies the intricacies of the testing process.
We also saw how Testkube can be integrated with the Jenkins pipeline that is triggered when a PR is opened, followed by the execution of a test, the results of which are shared back to the developer in the PR itself.
To experience the full potential of testing on Testkube, you can go ahead and give Testkube a try today.
Try out the various tests supported in Testkube and learn how Testkube simplifies and empowers your testing process with its cloud native capabilities. Join our Slack community for guidance and support.
About Testkube
Testkube is the open testing platform for AI-driven engineering teams. It runs tests directly in your Kubernetes clusters, works with any CI/CD system, and supports every testing tool your team uses. By removing CI/CD bottlenecks, Testkube helps teams ship faster with confidence.
Get Started with a trial to see Testkube in action.