Table of Contents
Start your free trial.
Start your free trial.

Start your free trial.


Table of Contents
Executive Summary
Why run k6 load testing in Kubernetes?
Kubernetes clusters are built for reliability and a degree of self-healing, including scaling horizontally with more pods running in parallel to absorb sudden bursts of demand. Like every other part of your application, from the UI to the APIs behind each service, that resilience is something you should prove rather than assume. Load testing your infrastructure is how you find out what actually happens when traffic spikes.
One of the most popular tools for that job is k6 (external). The open-source project is cloud-native friendly and backed by a large community of developers and testers, and it was acquired by Grafana Labs, a leader in infrastructure observability, in 2021. The repository has more than 24,000 GitHub stars and over 150 active contributors.
What is k6, and why pair it with Kubernetes?
k6 is an open-source load testing tool. You write your test in JavaScript, define how many virtual users to simulate and for how long, and k6 generates traffic against a target while measuring response times and error rates. It is efficient enough to push a heavy load from a single machine by using every CPU core.
Running k6 in Kubernetes adds two things on top: the cluster gives you somewhere to run the load generator close to the application, and it lets you scale that generator out across multiple pods for distributed load testing. The challenge is wiring all of that together cleanly.
The problem with running k6 on Kubernetes with the k6 operator
To run distributed k6 tests on Kubernetes the native way, you clone the k6 operator repository (external) and deploy it to your cluster manually using Make and Kustomize. The k6 team has signaled it wants k6 to be friendlier toward cloud-native technology like Kubernetes, but that support is still maturing, and the integration is fairly involved if you do not have a strong DevOps background.
To see the results of a given run, you call kubectl logs [POD] and read k6's output. There are no built-in instructions for surfacing detailed performance metrics or dashboards, although it is possible with enough customization. Working with an operator like this adds complexity to your testing process and your CI/CD pipelines, and it still will not store or aggregate results over time. So you can run the test, but you cannot easily compare last week's run to today's.
How Testkube runs k6 load tests in Kubernetes differently
Testkube tackles both problems by handling k6 execution through its dashboard, CLI, and API, so you can build end-to-end test workflows with minimal steps and full control. It is a Kubernetes-native test orchestration framework, which means it uses CRDs to manage tests. You create and run tests with commands such as kubectl testkube create testworkflow ... and kubectl testkube run testworkflow ....
When the Testkube CLI runs, or when your CI/CD pipeline runs it for you, the request goes to the Testkube agent in the cluster, which provisions the resources needed to execute the workflow. The k6 load generator runs as a pod inside your cluster, and when the run finishes you review the results in the dashboard. Because every execution is captured, you can aggregate any number of k6 results in one place, stored alongside other tests you run, such as Postman, Cypress, or JMeter. For setup details, see the Testkube k6 documentation and the Testkube agent overview.
That turns the loop of load test, try an improvement, and test again into something you can run on demand or automate entirely through CI/CD.
How to run a k6 load test in Kubernetes with Testkube
Here is the full path from zero to a stored k6 result. The two-minute walkthrough below covers the same steps if you prefer to watch.
Step 1: Get Testkube
The fastest way to install Testkube is to sign up for a free trial and configure your environment, which could be a local cluster like Minikube or k3s, or a managed cluster like GKE, EKS, or AKS. You can also choose whether to self-host Testkube on your own cluster or use the Testkube SaaS. A few commands later, you are ready to test against your cluster.
With Testkube you create Test Workflows, which define how a test executes inside your environment, including every step and the configuration for your testing tool of choice.
Step 2: Create your k6 Test Workflow
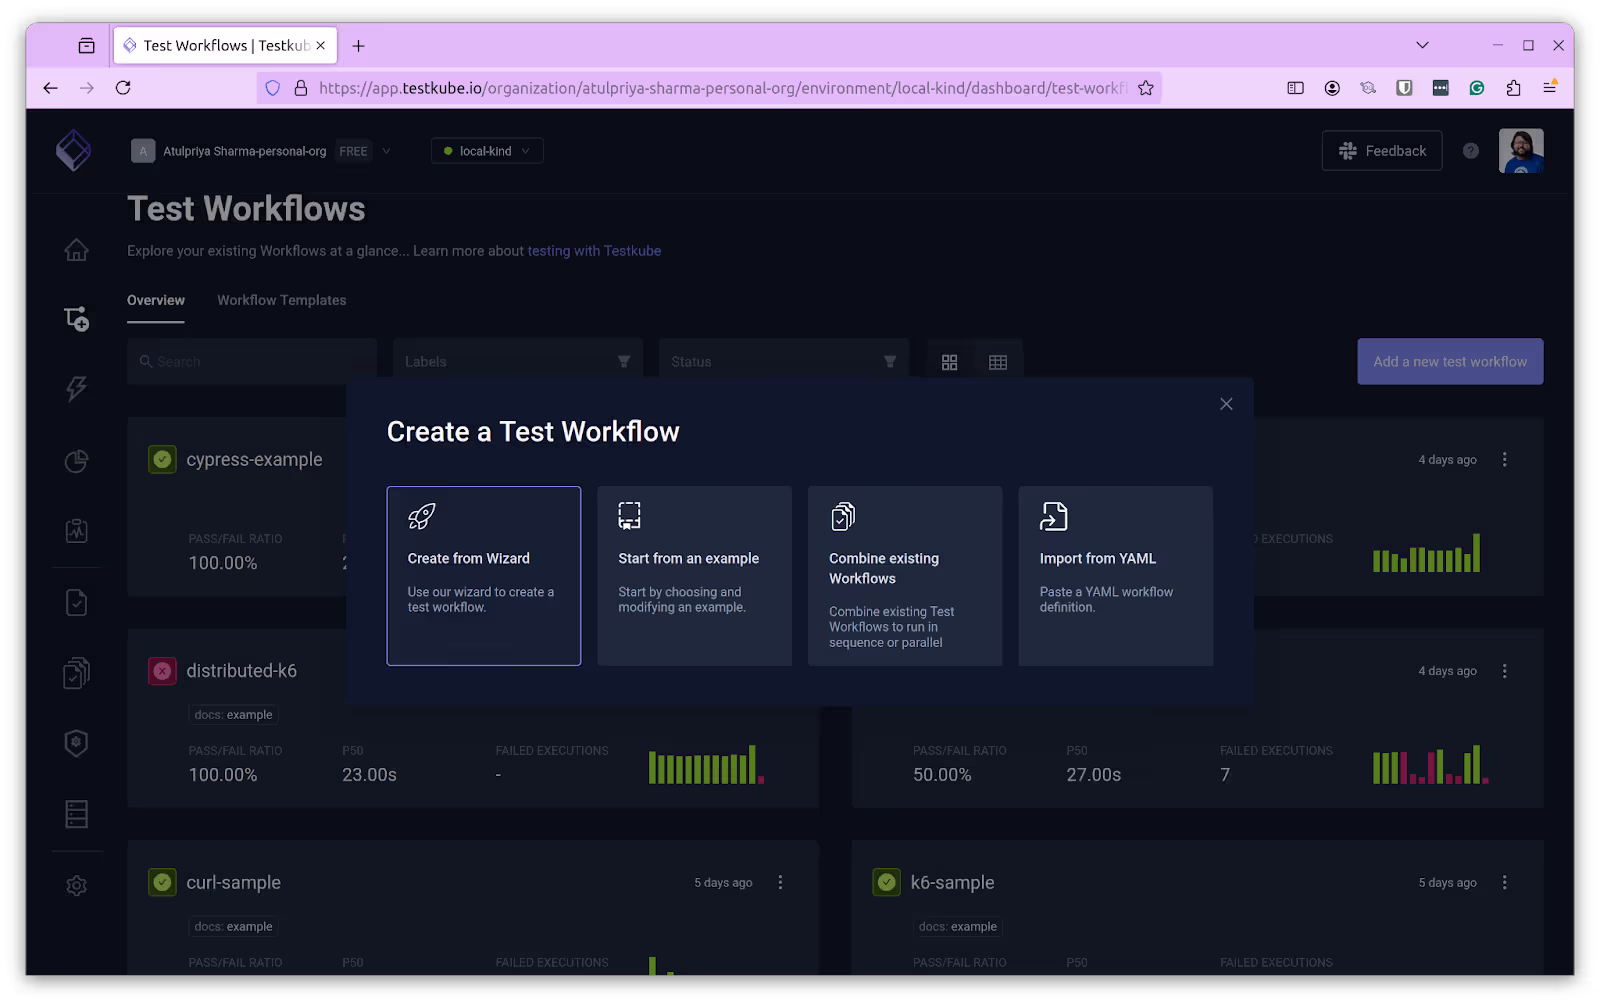
The easiest way to create a workflow is from the dashboard. Open the Test Workflows tab and click Add a new test workflow. You get four options:
- Create from Wizard — build a Test Workflow step by step.
- Start from an example — use existing k6, Cypress, and Playwright examples.
- Combine existing workflows — compose from workflows you already have.
- Import from YAML — bring your own Test Workflow definition.
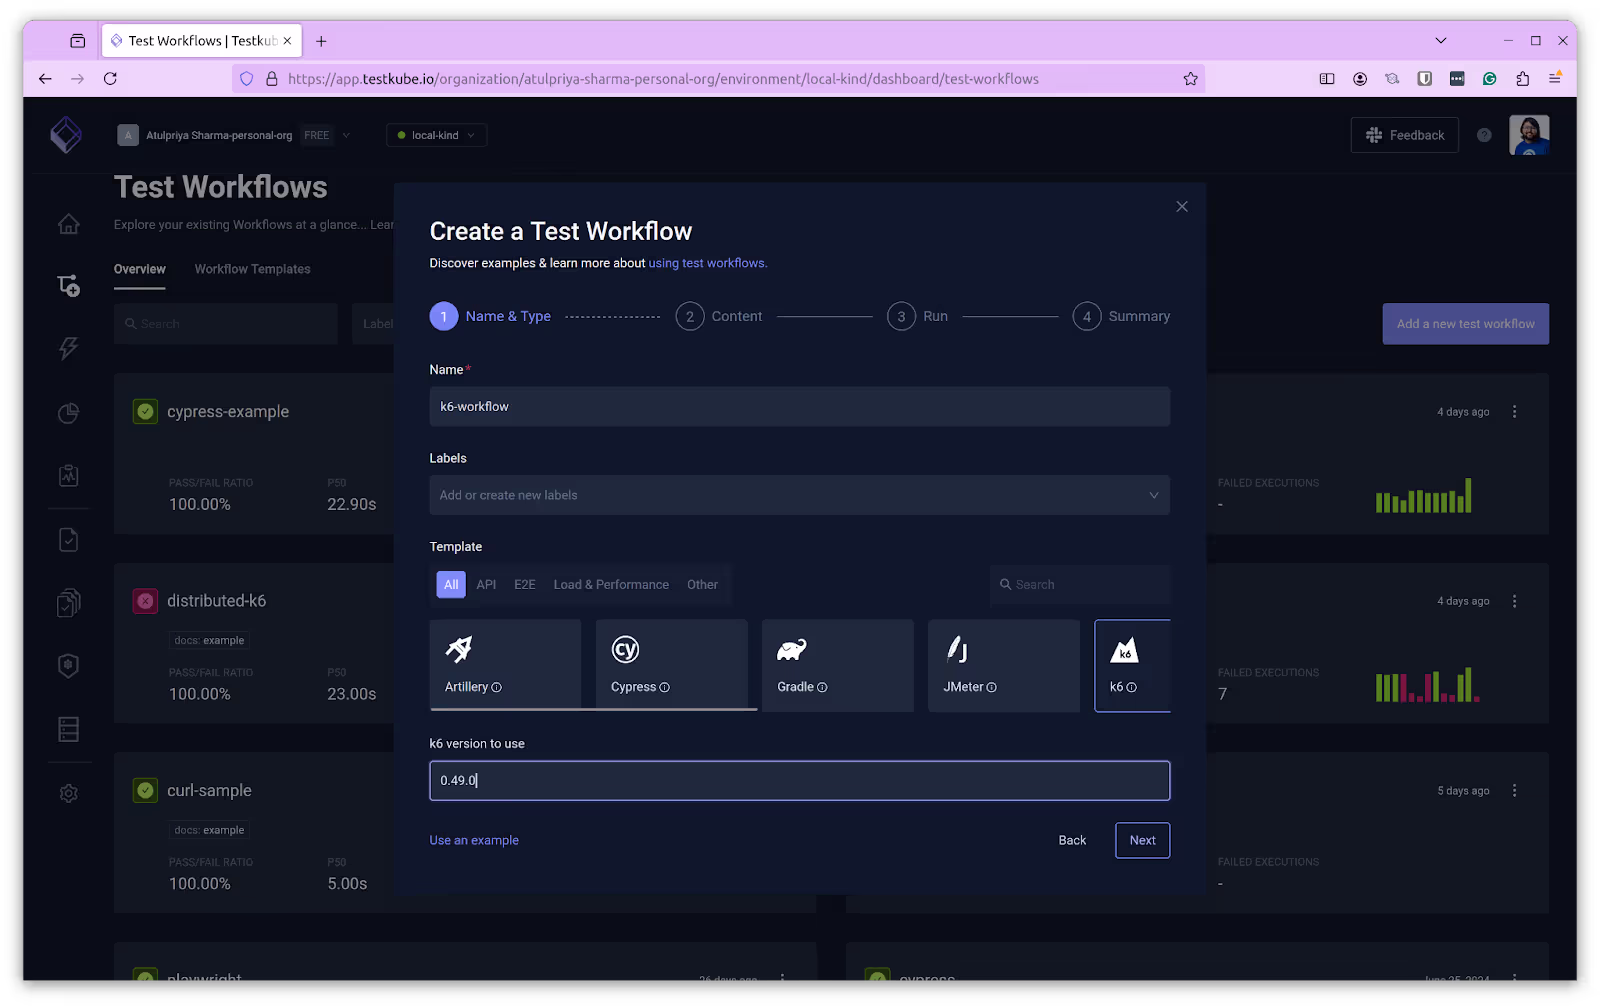
Choose Create from Wizard, then provide a name (for example k6-workflow), pick the k6 template, and select a k6 version.
In the next dialog, set the content type to String to generate a sample test in a new k6.js file.
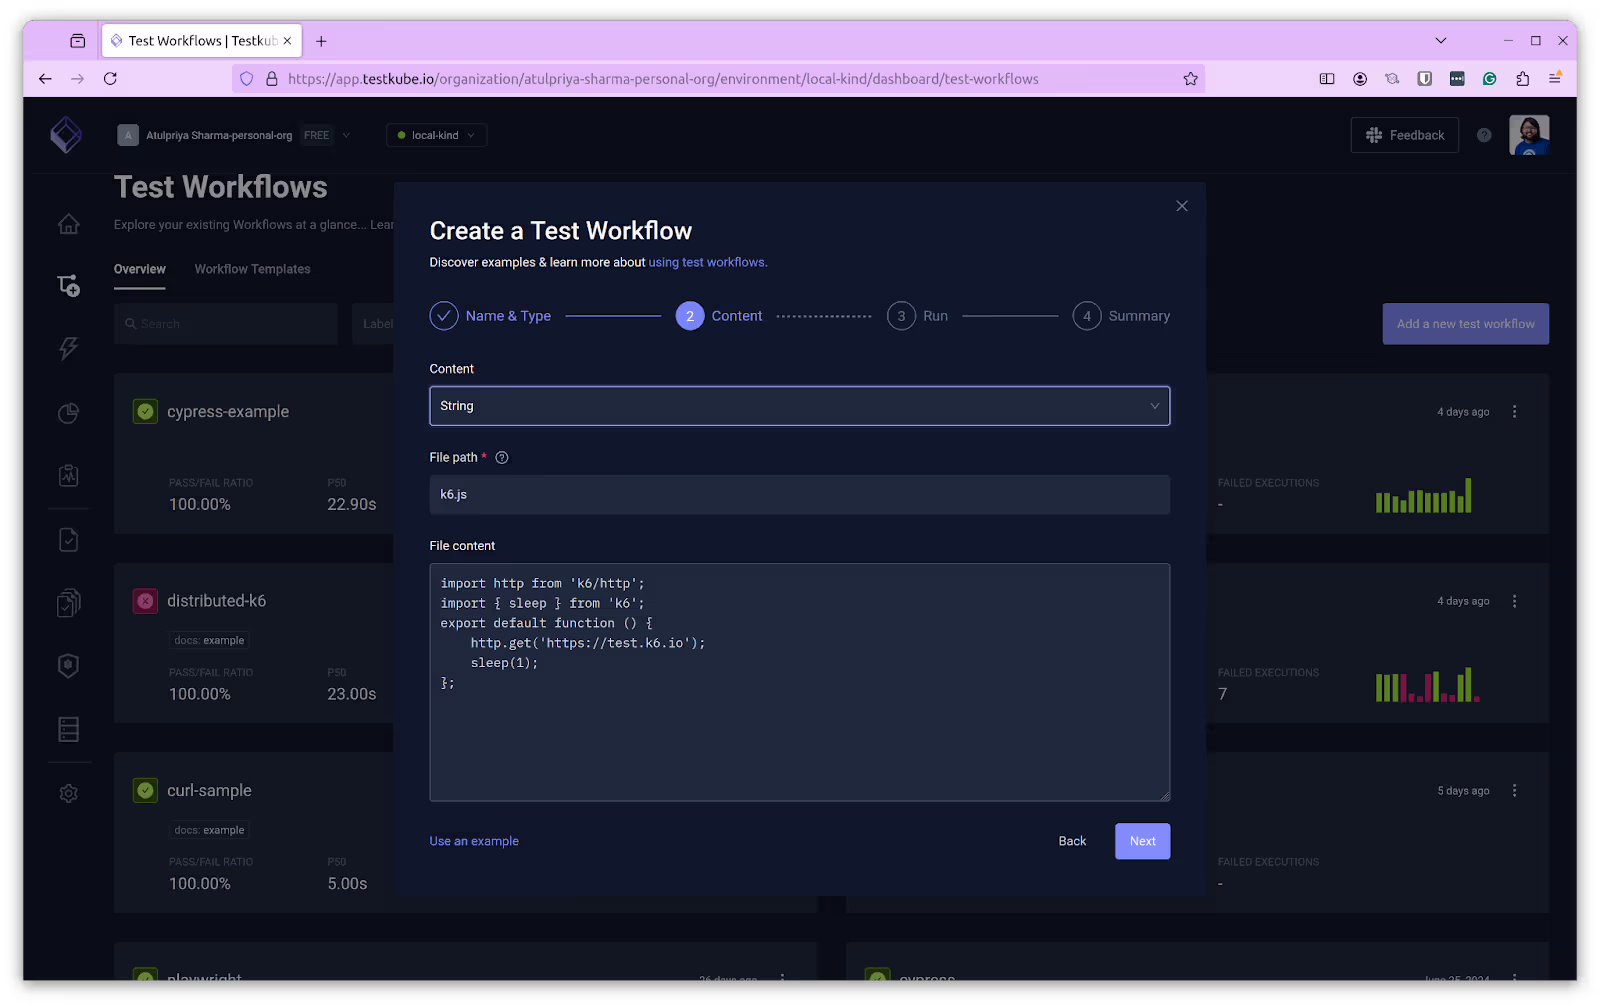
Then provide the run command (the default k6 run k6.js works). The wizard shows the generated spec in the final dialog.
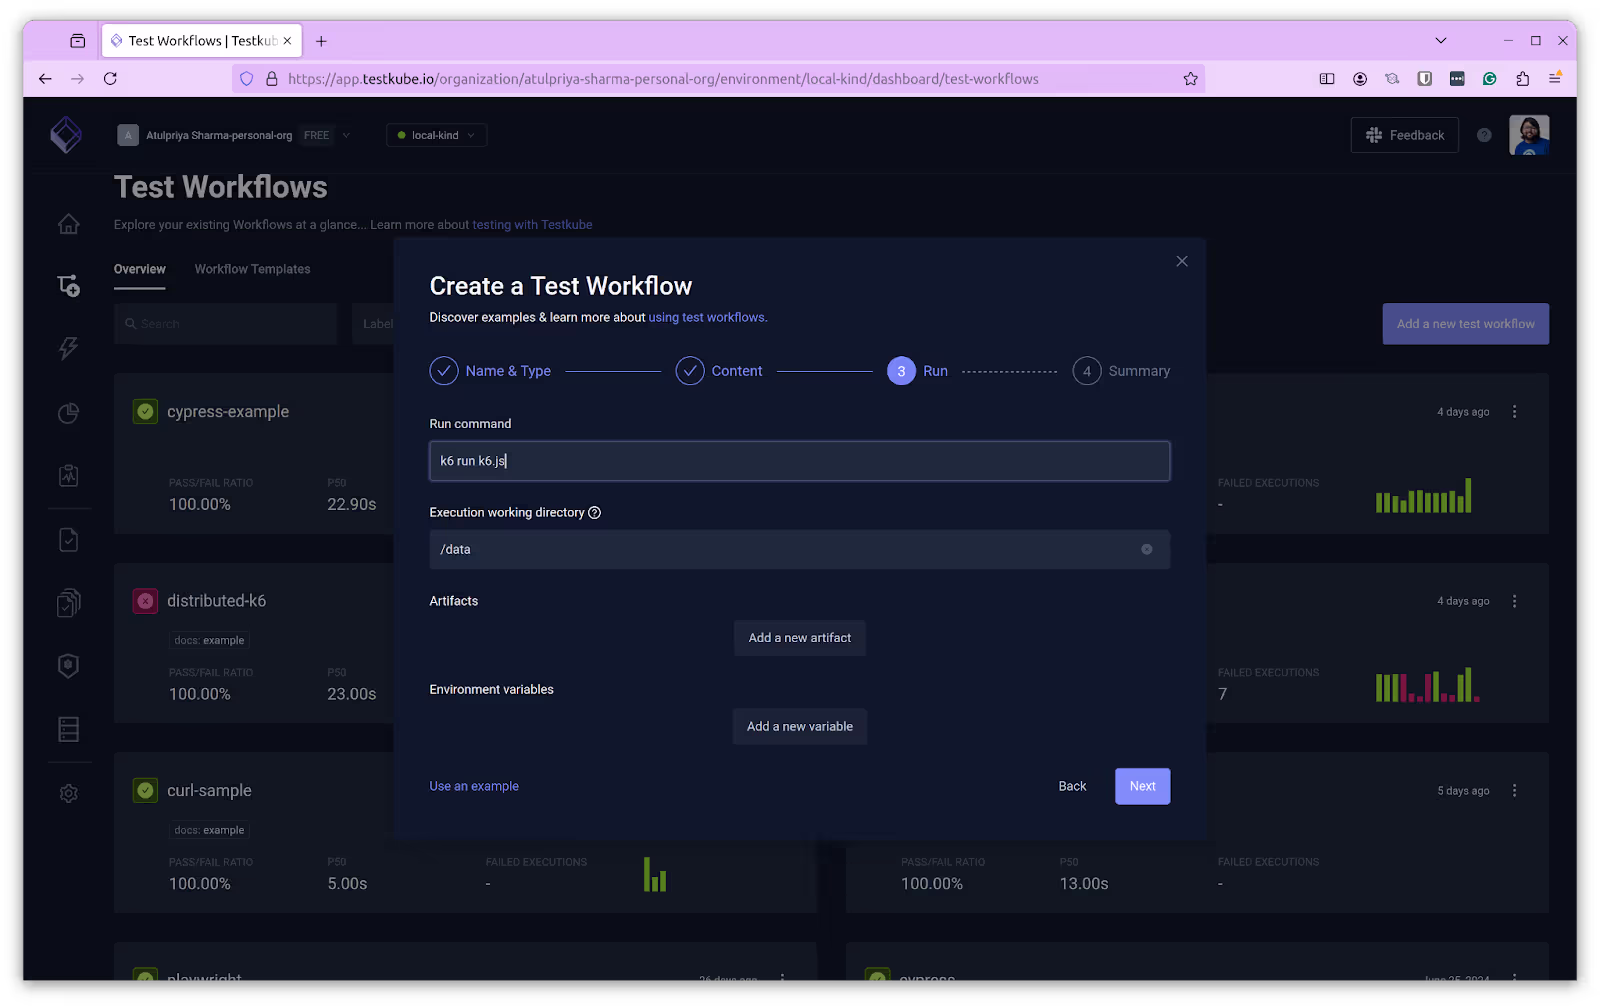
Step 3: Run the workflow

Below is a generated spec for a k6 Test Workflow. Click Create & Run to create the workflow and kick off the first execution.
kind: TestWorkflow
apiVersion: testworkflows.testkube.io/v1
metadata:
 name: k6-sample
 namespace: testkube
 labels:
   docs: example
spec:
 content:
   files:
     - path: /data/example.js
       content: |-
         import http from 'k6/http';
         import { sleep } from 'k6';
         export default function () {
             http.get('https://test.k6.io');
             sleep(1);
         };
 steps:
   - name: Run Tests
     workingDir: /data
     run:
       image: grafana/k6:0.49.0
       env:
         - name: K6_WEB_DASHBOARD
           value: 'true'
         - name: K6_WEB_DASHBOARD_EXPORT
           value: k6-test-report.html
       args:
         - run
         - example.js
     artifacts:
       paths:
         - k6-test-report.html
This guide will not cover the nuances of writing a k6 script. The k6 documentation is a strong resource for that. The workflow starts executing, and Testkube updates the status once the run finishes.
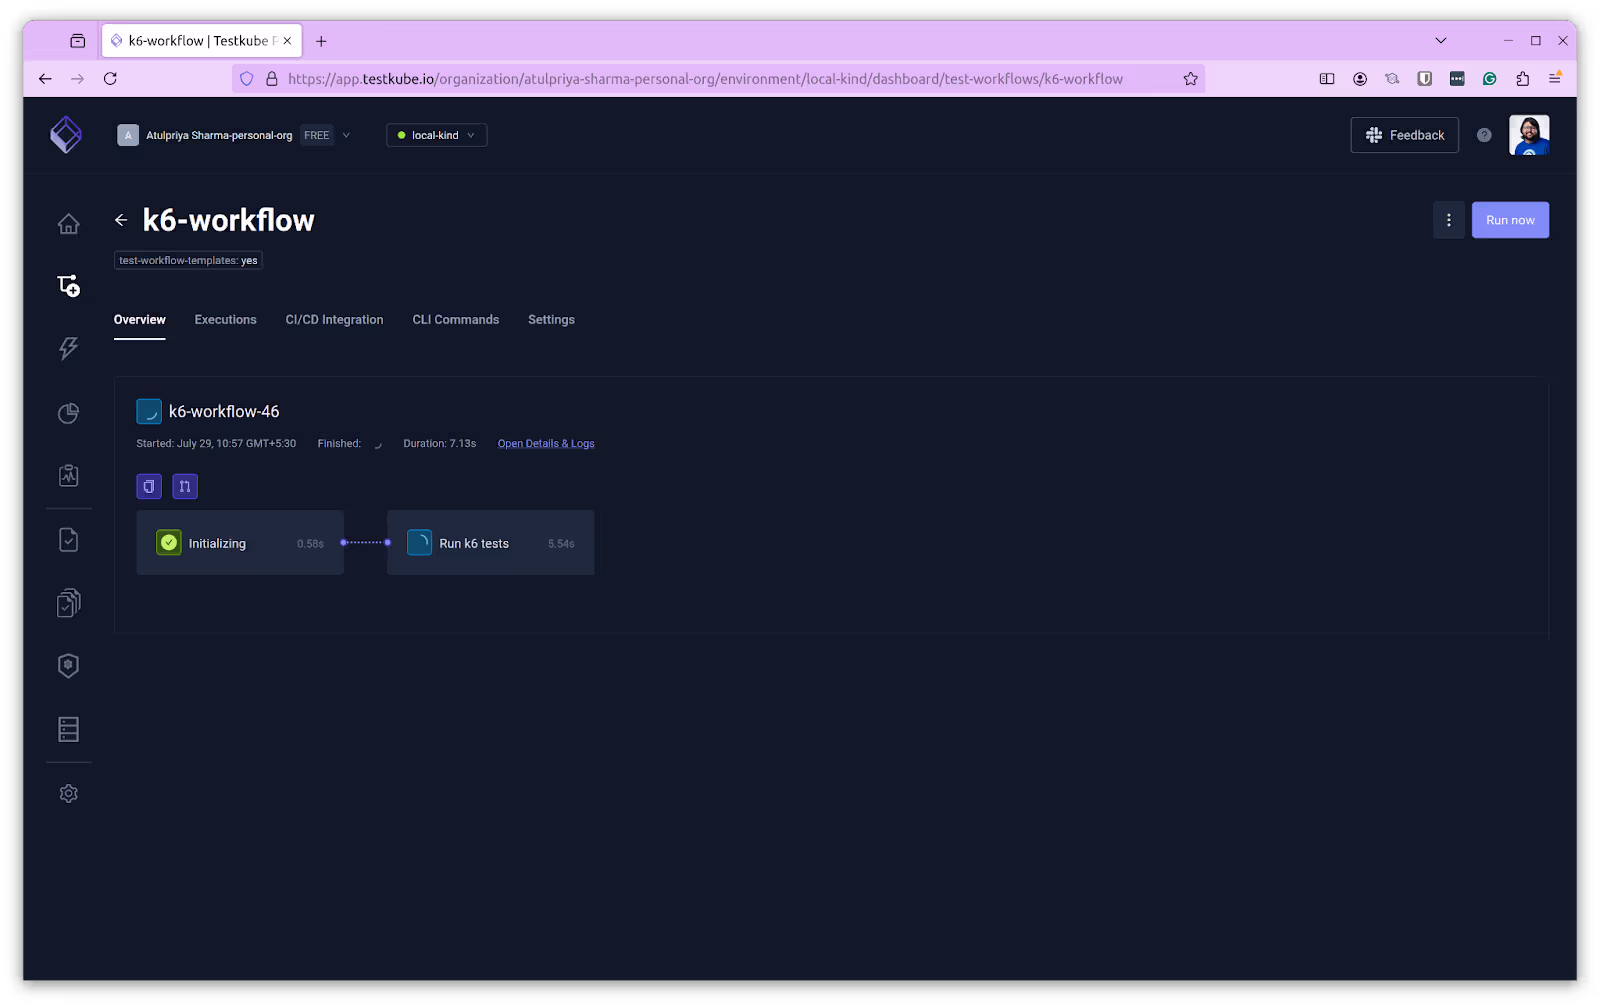
Step 4: View logs and results
Testkube handles every part of running, managing, storing, and visualizing your k6 scripts. When an execution finishes, click Open Details & Logs, open the Artifacts tab, and open the report.
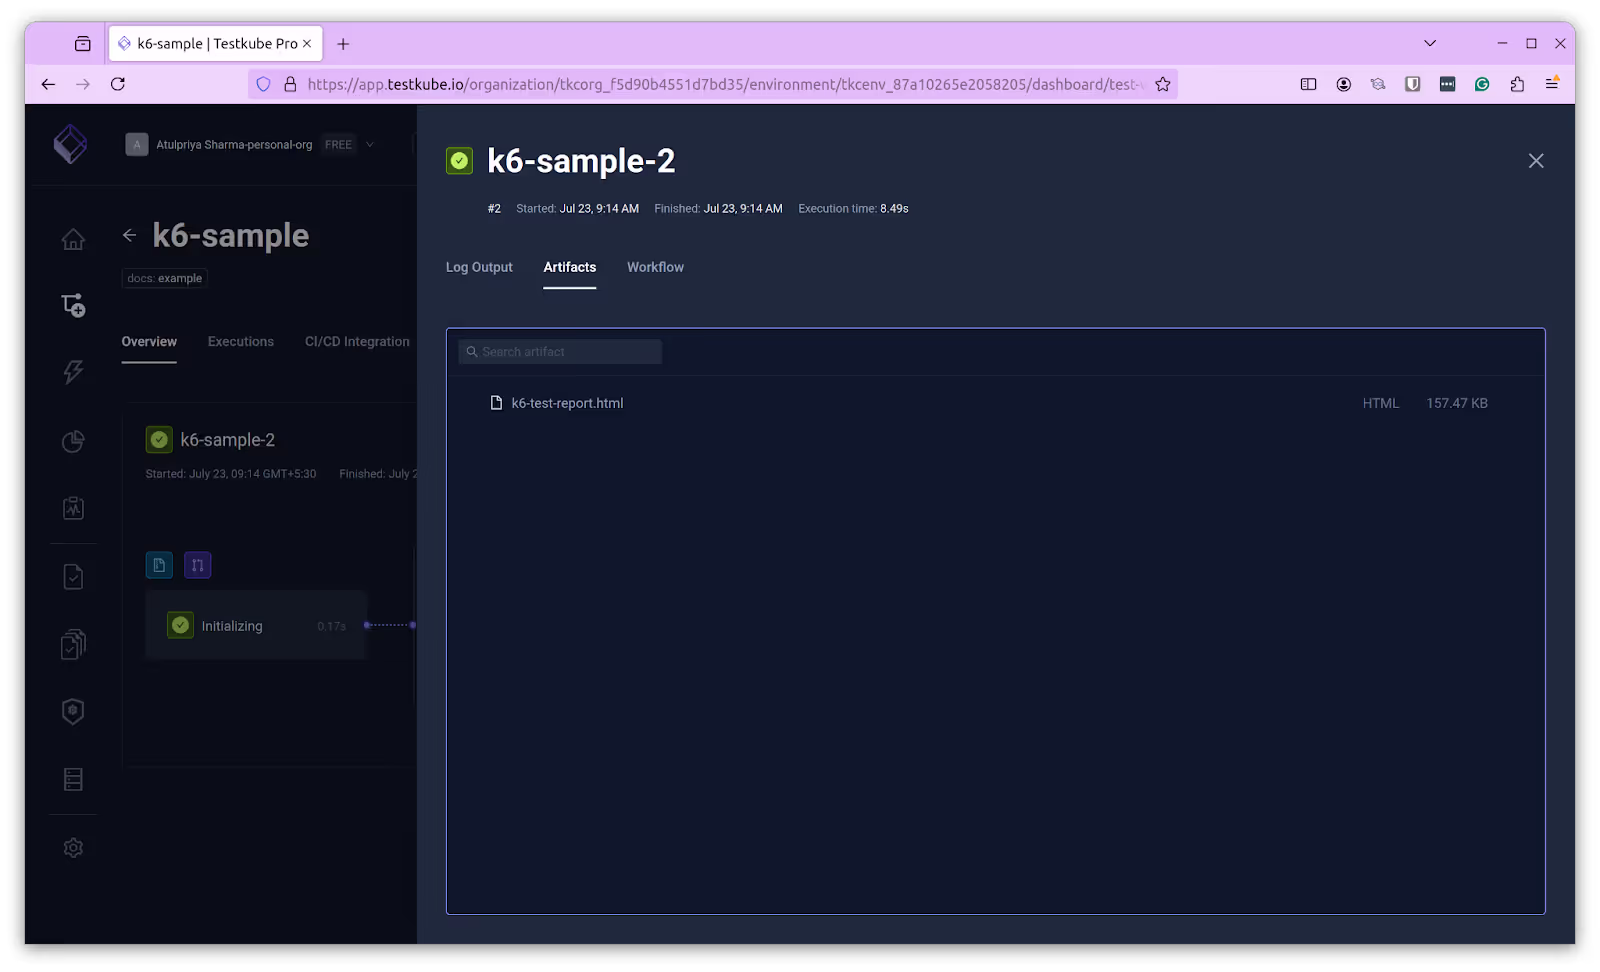
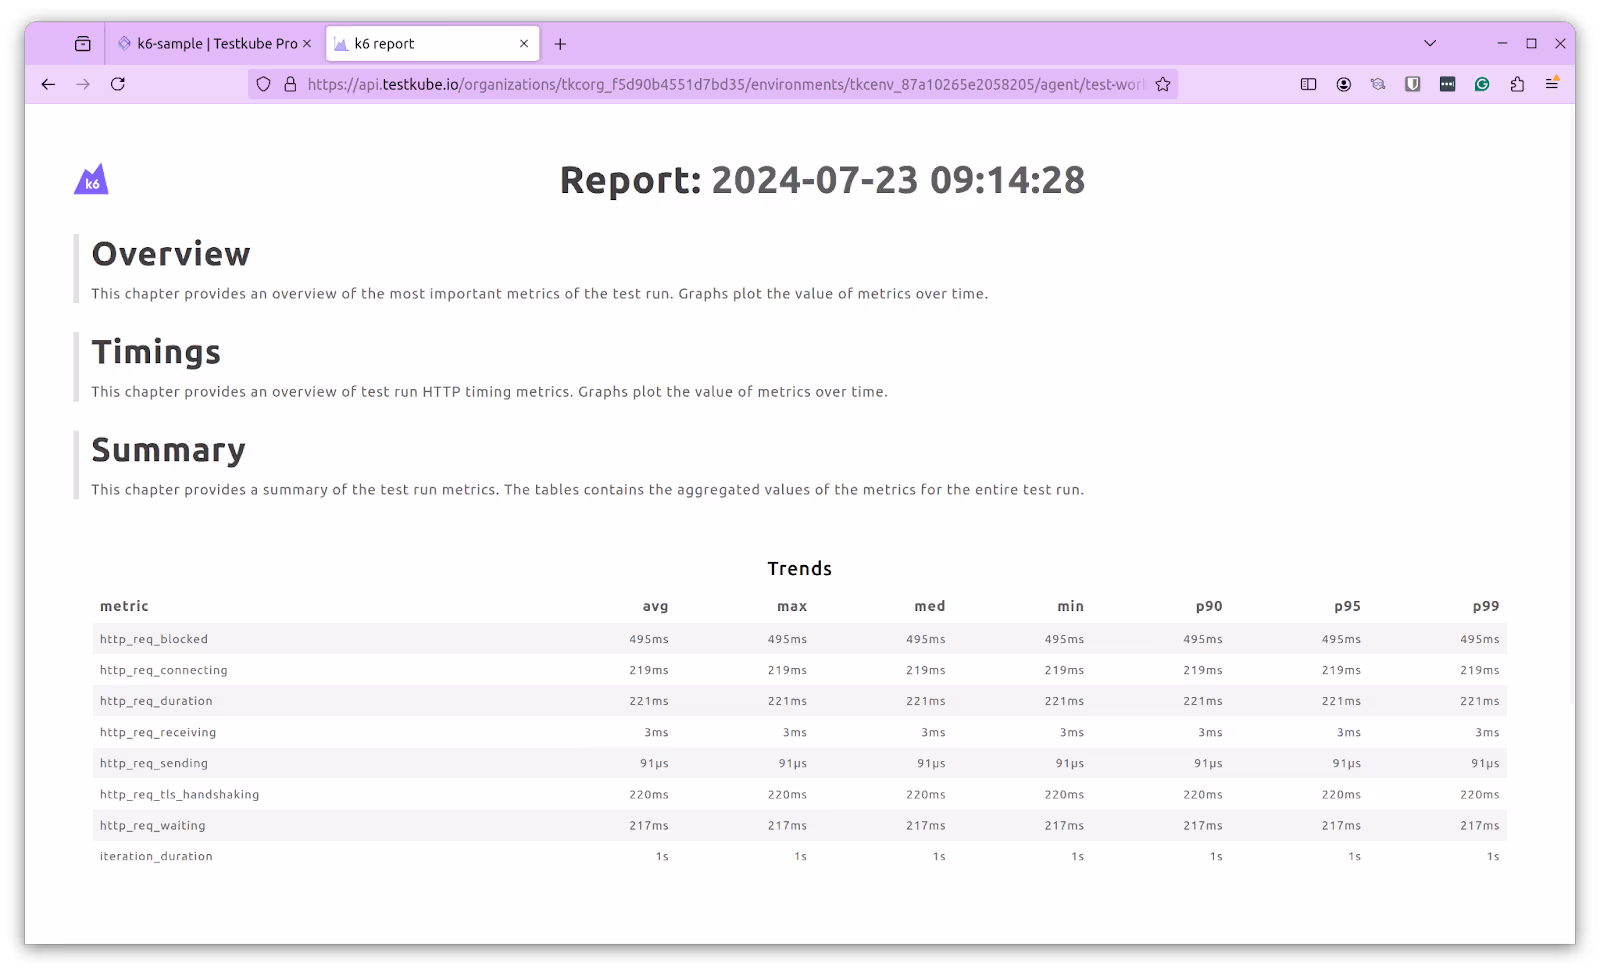
The k6 web dashboard report opens in a new tab with the full detail of the run. Because results land in centralized test observability, you can compare runs over time instead of reading one-off logs. See the test observability feature for how that view works across tools.
k6 operator vs Testkube: which should you use?
Both run k6 inside Kubernetes, so the question is how much you want to build and maintain yourself. The k6 operator gives you distributed execution but expects deep Kubernetes knowledge and leaves results, history, and UI up to you. Testkube layers in-cluster test execution with a dashboard, stored history, and triggers from CI/CD or CRDs.
Running distributed k6 tests at scale
A single load generator eventually hits a ceiling. Distributed k6 spreads the work across multiple pods so you can model production-scale traffic, and Kubernetes features such as the Horizontal Pod Autoscaler let those workers scale test execution horizontally. Testkube runs distributed k6 through parallel Test Workflows: you set the duration, virtual users, and worker count at run time, and Testkube consolidates the results. The step-by-step version lives in the scalable and heavy load testing guide.
What is next?
Now that you have run a k6 load test on your own Kubernetes infrastructure without being a Kubernetes expert, the next step is to add it to your CI/CD pipeline alongside your UI and API tests. With load testing built into your development lifecycle and every result in one UI, you can watch how a cloud-native application behaves over time and through major changes: catch regressions, trace root causes, and tune. For teams that want tests to run on cluster rather than only on pipeline triggers, running tests outside the CI pipeline and adopting continuous testing are the natural follow-ons.
Key takeaways
- k6 is the practical choice for Kubernetes load testing. It is open source, scriptable in JavaScript, backed by Grafana, and efficient enough to drive heavy load from limited resources.
- The k6 operator works but carries overhead. Cloning a repo, installing with Make and Kustomize, and reading
kubectl logsgives you execution without a UI or stored history. - Testkube runs k6 inside your cluster as Test Workflows. You trigger runs from the dashboard, CLI, API, or CI/CD, with no operator to maintain.
- Results are stored and aggregated in one place. k6 runs sit alongside Postman, Cypress, and JMeter results, so you can compare over time instead of inspecting one-off logs.
- Distributed k6 scales through parallel workflows. Spread load across pods to model production traffic, then let Testkube consolidate the metrics.
Frequently asked questions
About Testkube
Testkube is the open testing platform for AI-driven engineering teams. It runs tests directly in your Kubernetes clusters, works with any CI/CD system, and supports every testing tool your team uses. By removing CI/CD bottlenecks, Testkube helps teams ship faster with confidence.
Get Started with a trial to see Testkube in action.