
Table of Contents
Try Testkube instantly in our sandbox. No setup needed.
Try Testkube instantly in our sandbox. No setup needed.


Table of Contents
Executive Summary
What is Testkube?
Testkube is a Kubernetes-native testing framework that enables teams to run, manage, and orchestrate tests directly within their Kubernetes clusters, supporting popular testing tools like Cypress, Playwright, and more for comprehensive cloud-native testing.
Testing is a crucial aspect of software development, ensuring that applications meet their requirements and perform as expected. Luckily, with modern testing advancements, testing our applications can be pretty intuitive as we have enough resources and tools available to guide us through it. In the world of Kubernetes, however, where containerized applications are orchestrated and deployed at scale, testing can become a little tricky.
In this article, we'll explore front-end testing of Kubernetes applications using Testkube, a comprehensive Kubernetes testing framework designed for cloud-native environments. We'll illustrate this with a web application deployed to a local Kubernetes cluster using Minikube, demonstrating best practices for automated testing in Kubernetes environments.
Testkube serves as a powerful solution for container testing, enabling robust CI/CD testing pipelines that integrate seamlessly with your existing development workflow.
Prerequisites and Setup
To follow this tutorial for implementing Kubernetes testing strategies, you'll need the following:
Docker and Kubernetes Requirements
- Docker
- A Kubernetes cluster is up and running (We are using Minikube)
- A web application using your tools of choice
- A Testkube account. You can sign up here
This container testing approach requires a robust CI/CD testing pipeline to ensure automated testing in Kubernetes environments delivers reliable results.
For this tutorial, I'll show you how I'm creating a very simple web app. You can of course use any you already have available, for which you'll only need to write your Dockerfile to deploy it to your cluster.
Creating Your Sample Web Application
Let's take a look at a simple web application we created with Node.js:
Our app will have two components, header.html and main.html.
We’ll now write the Dockerfile for it to be able to deploy it into our cluster:
Let’s build, deploy it, and get the service URL:
Once you open the provided URL, you should be able to access your web app in the browser as shown below.
Ready to implement these cloud-native testing strategies? Try Testkube for free and see the difference in your development workflow.

Now, let's write a few tests for our application. We'll be using Cypress and Playwright testing tools to illustrate a more realistic scenario where we rely on different frameworks for comprehensive front-end testing for cloud-native apps.
Cypress Testing Implementation
Cypress is a powerful end-to-end testing framework perfect for automated testing in containerized environments. Here is an example of a Cypress test for our web app:
This test is available on GitHub in the file cypress-test.cy.js. Replace the <service-ip:port> with your cluster-specific details.
Playwright Testing Setup
Playwright is a testing library that allows us to automate different browsers, making it ideal for how to test applications in Kubernetes environments:
This test is available on GitHub in the file playwright-test.spec.js. Replace the <service-ip:port> with your cluster-specific details.
Both these tests are designed to check the ‘/’ page of the web app prints “Hello, Kubernetes!”.
Running Front-End Tests from within your Kubernetes Cluster
Running tests from within your Kubernetes cluster involves setting up testing infrastructure within the cluster itself. Typically, you would deploy testing tools as part of your testing environment.
For this, you would need to configure your testing system and environment that's integrated with your CI/CD pipeline, package all of your test scripts and other dependencies into Docker images, and provide the necessary access to your application, as well as putting a tool or system into place to store and retrieve test results.
Fortunately, Testkube can help us speed run through all these configurations for Cypress testing in Kubernetes clusters.
Using Testkube for Front-End Testing
Testkube simplifies the process of running tests within your Kubernetes cluster by providing a Kubernetes-native system. With Testkube, you can create, manage, and execute tests using Custom Resource Definitions (CRDs) and a user-friendly dashboard. Let's explore how Testkube streamlines the testing workflow:
Prerequisites
- Get a Testkube account.
- Kubernetes cluster - we’re using a local Minikube cluster.
- Testkube Agent configured on the cluster.
After meeting the prerequisites, you can launch a target Kubernetes cluster with a configured Testkube agent.
Deploying Tests with Testkube
Testkube simplifies the process of running tests within your Kubernetes cluster by providing a Kubernetes-native system. With Testkube, you can create, manage, and execute tests using Custom Resource Definitions (CRDs) and a user-friendly dashboard. Let's explore how Testkube streamlines the testing workflow:
Prerequisites for Testkube Setup
- Get a Testkube account.
- Kubernetes cluster - we're using a local Minikube cluster.
- Testkube Agent configured on the cluster.
After meeting the prerequisites, you can launch a target Kubernetes cluster with a configured Testkube agent.
Start Running Your Tests Using Test Workflow in Testkube
Now all you need to do is tell Testkube where your project and your tests are and it will do the rest. We have kept all our tests in a GitHub repository and Testkube can easily access them using the URL.
Testkube comes with pre-existing testing types, which include Cypress and Playwright. Let’s create our Cypress test first, for which we can use a repository as our source. Head over to Add a New Test Workflow in the Testkube Dashboard.
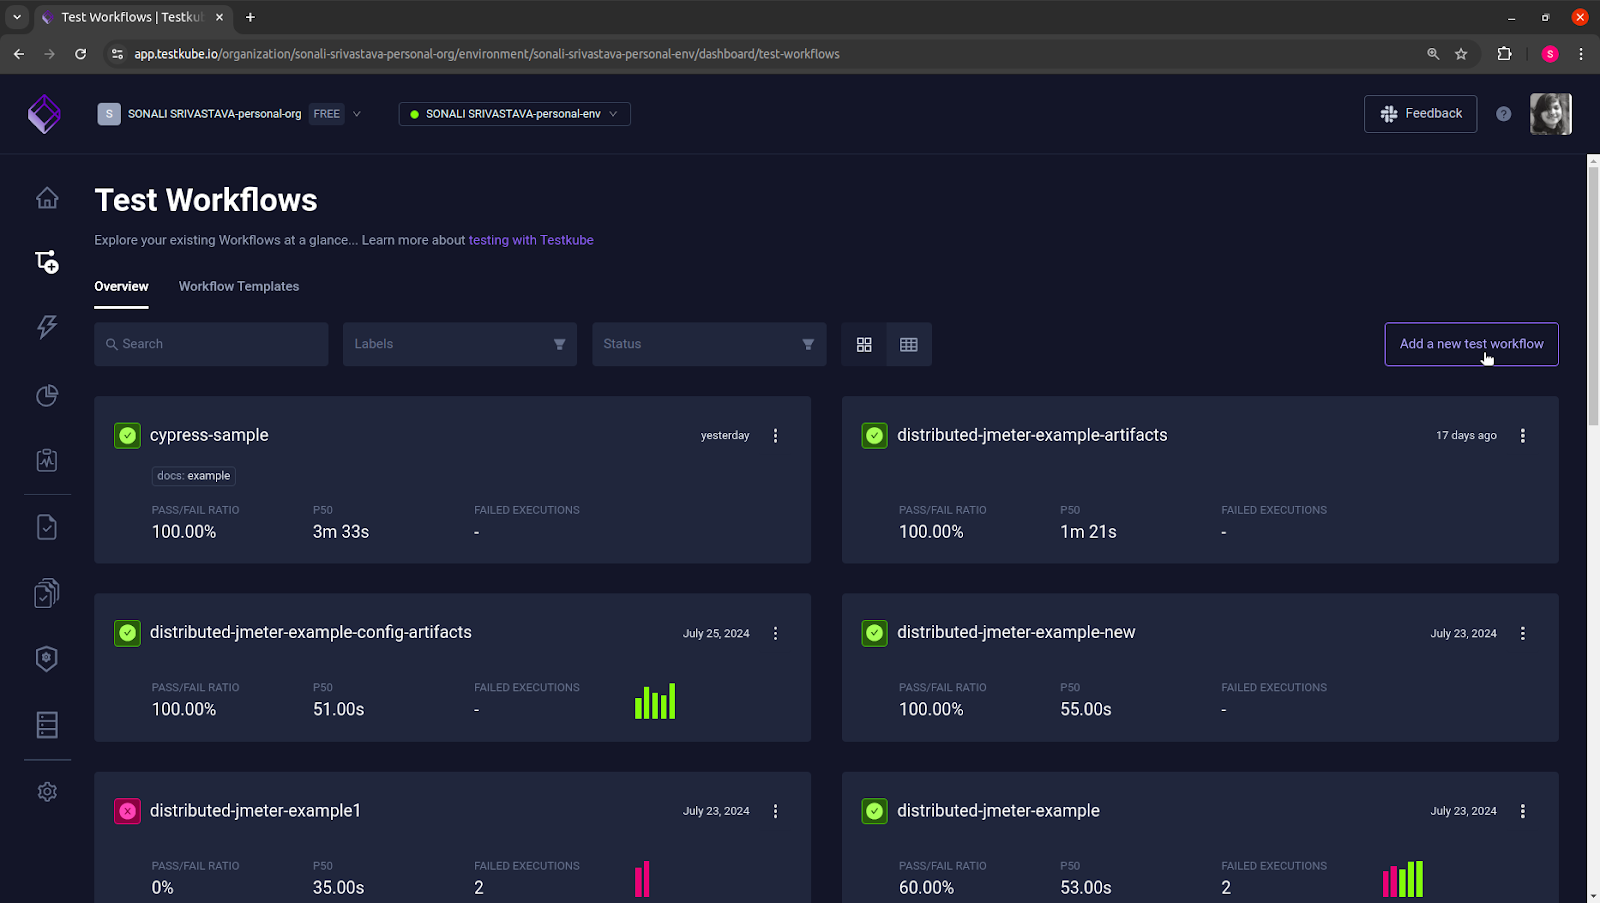
A “Create a Test Workflow” dialog box appears that provides you with four options to create a Test Workflow:
- Create from Wizard: This option opens a dialog box that prompts you to create a new Test Workflow.
- Start from an Example: This option allows you to use a pre-configured example, such as k6, Playwright, Cypress, Playwright, Postman, and many others.
- Combine Existing Workflows: This option allows you to combine and execute multiple existing Test Workflows sequentially or simultaneously.
- Import a Workflow from YAML: This option allows you to import a Test Workflow from a YAML definition.
Choose the “Start from an Example” option to create this workflow.
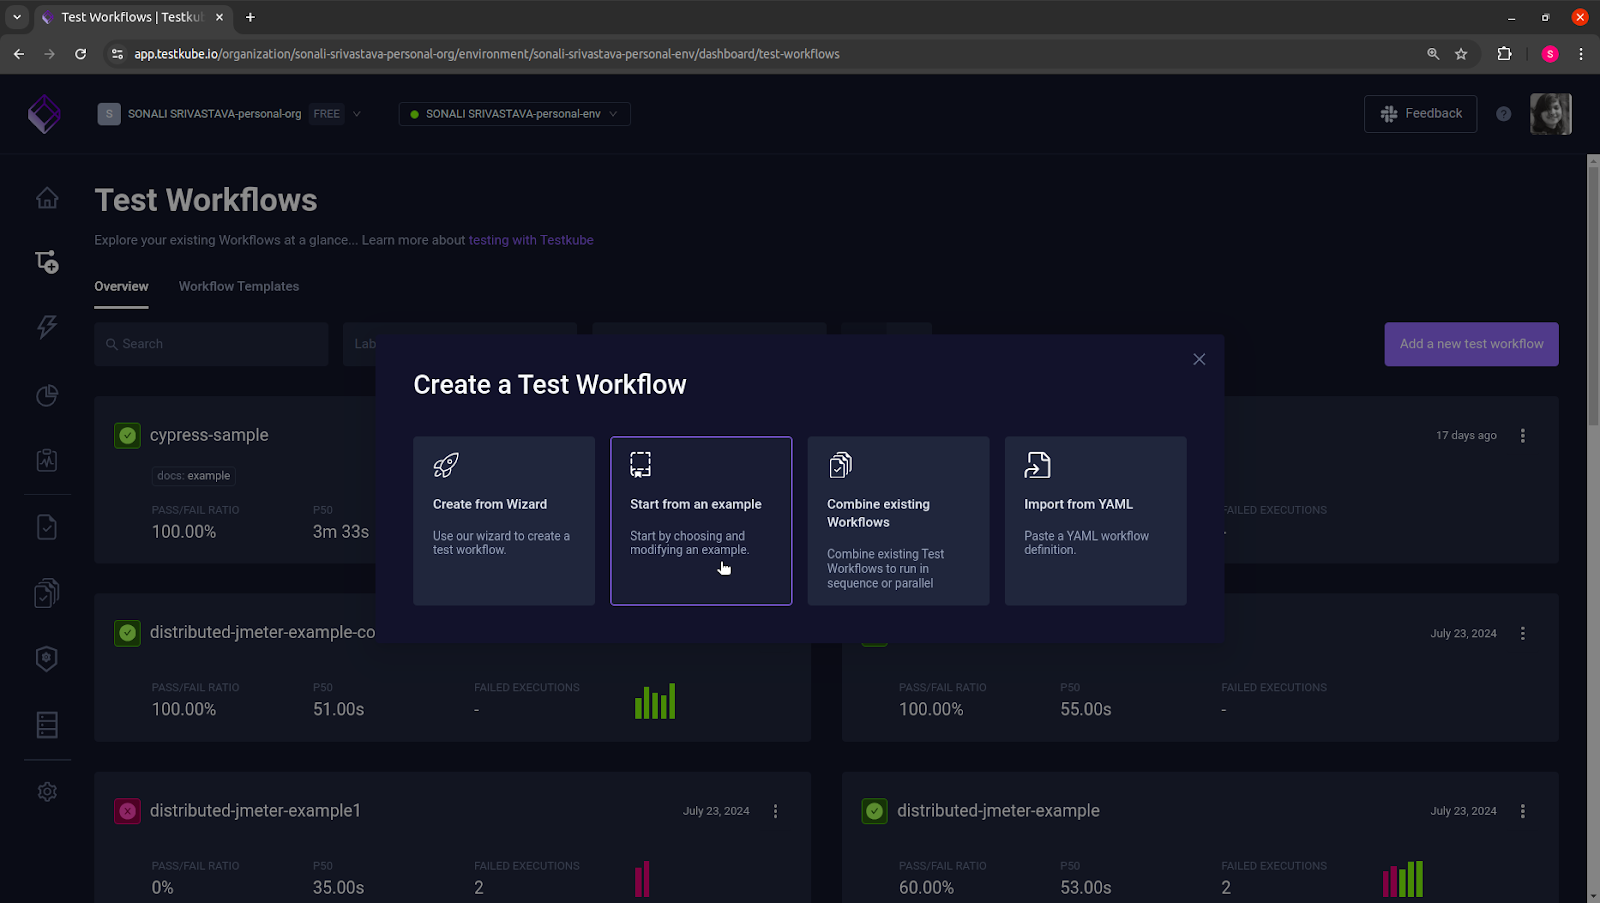
A new dialog box appears, with a list of test tools. We will start with creating first the Cypress Test Workflow so choose “Cypress” to get started.
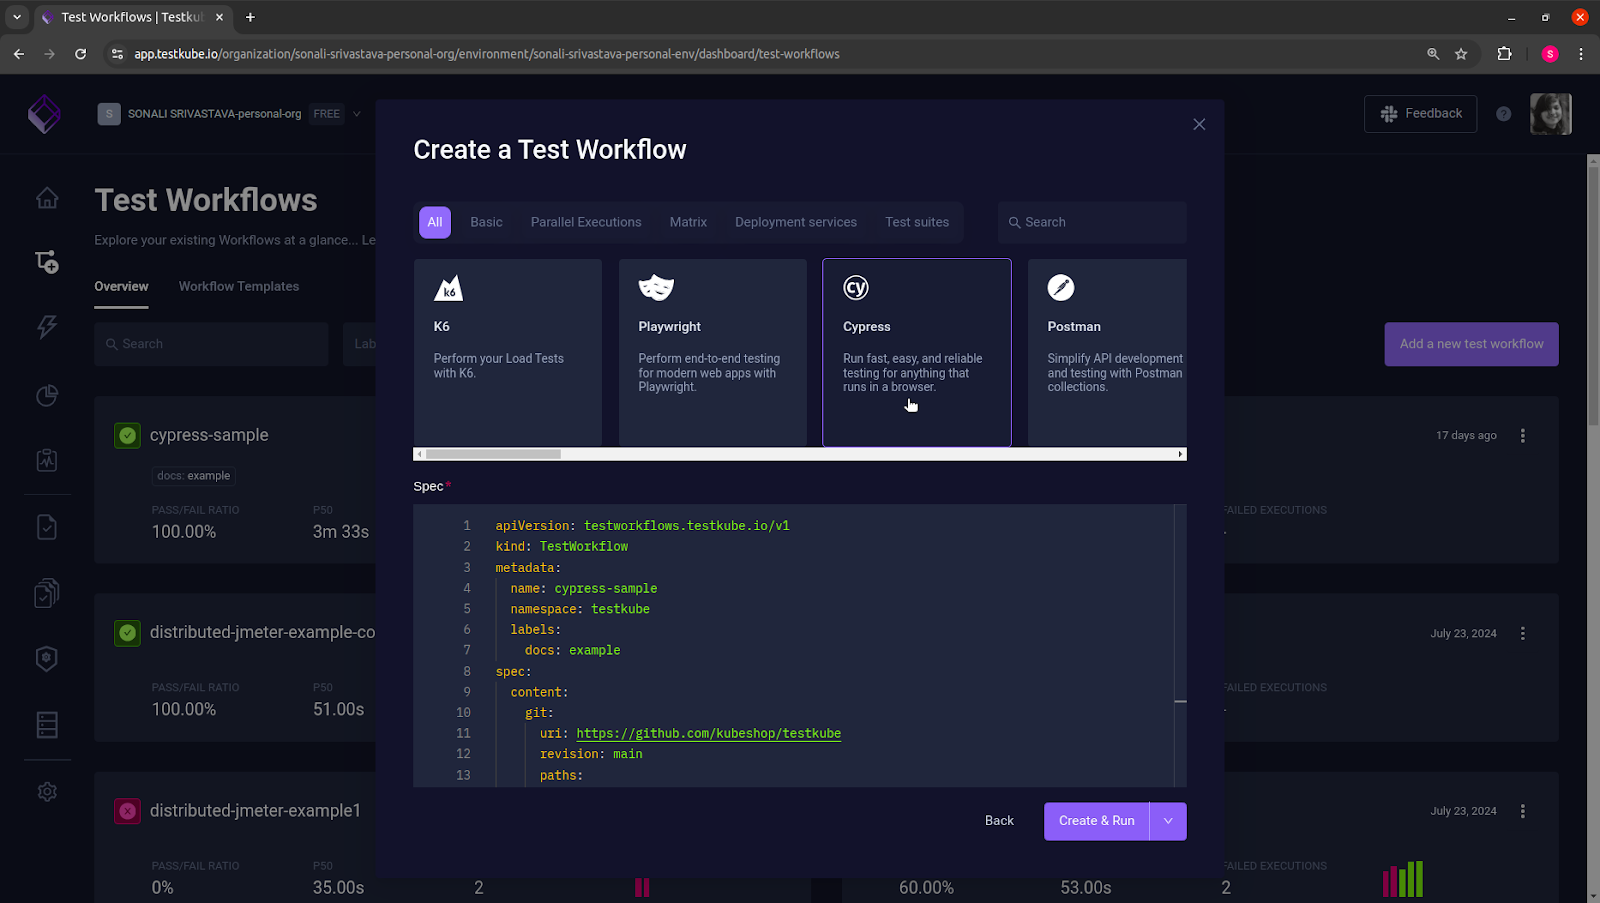
Update the Spec here with the path to your Git repository that has the tests. Here is what our configuration looks like:
Click on the “Create & Run” button to create and run the Test Workflow.
Testkube creates the Test Workflow and executes the tests as shown below:
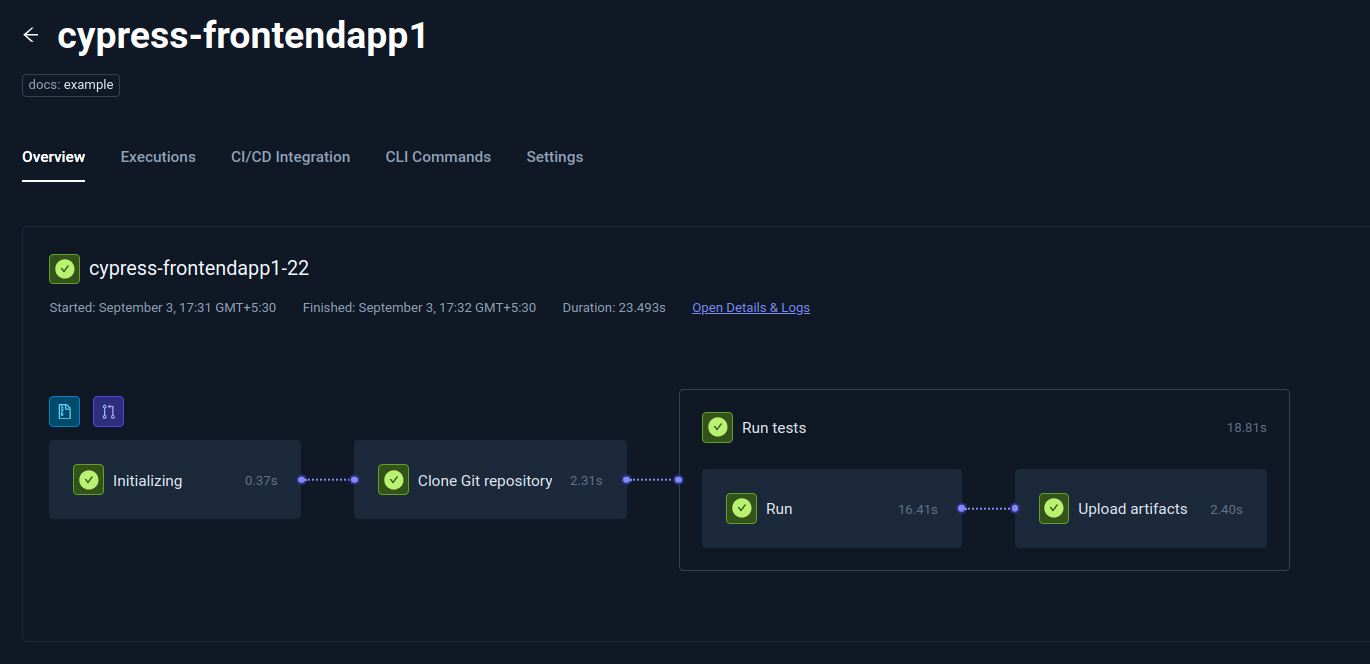
Select “Run” to view the test logs. The following image shows the execution of our test in the file cypress-test.cy.js.
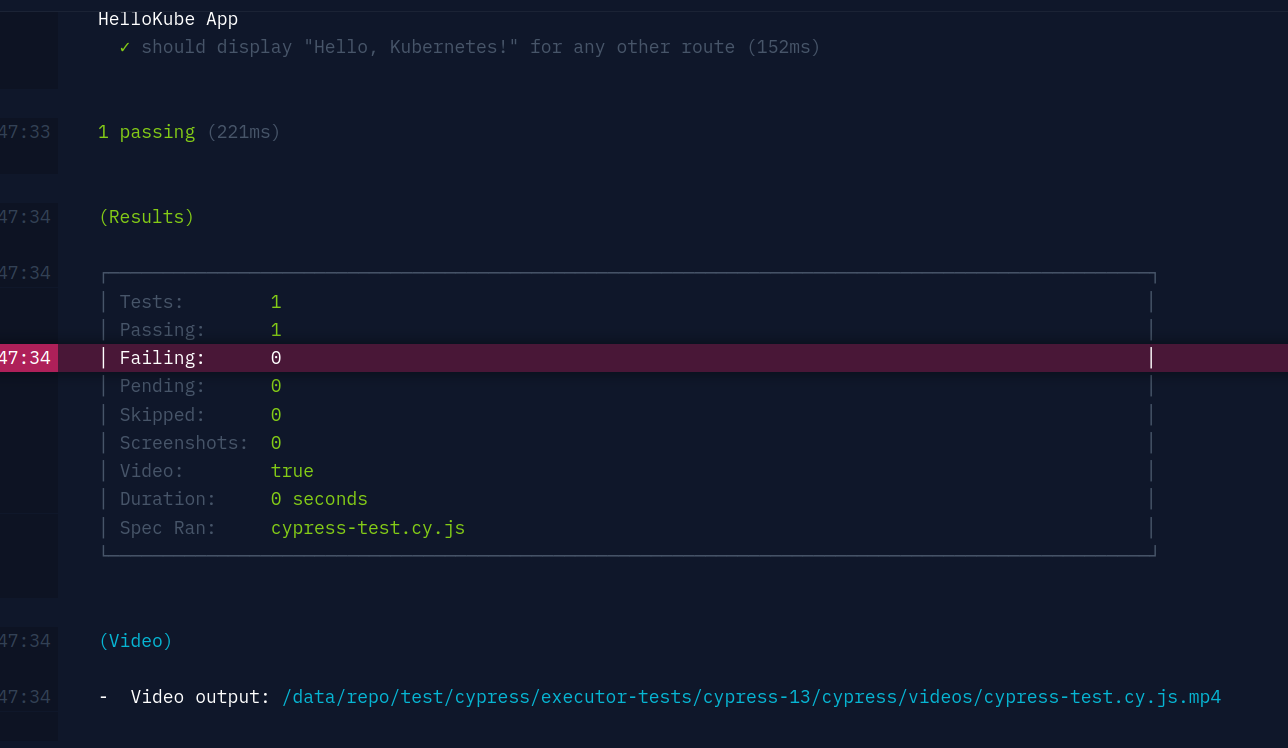
As we can see, our test is running successfully!
By clicking on the execution, you can see the logs in real-time and run your test as many times as you wish.
Now, let’s repeat the same process for our Playwright test.
Create a Test Workflow in the Testkube Dashboard using “Playwright” example.
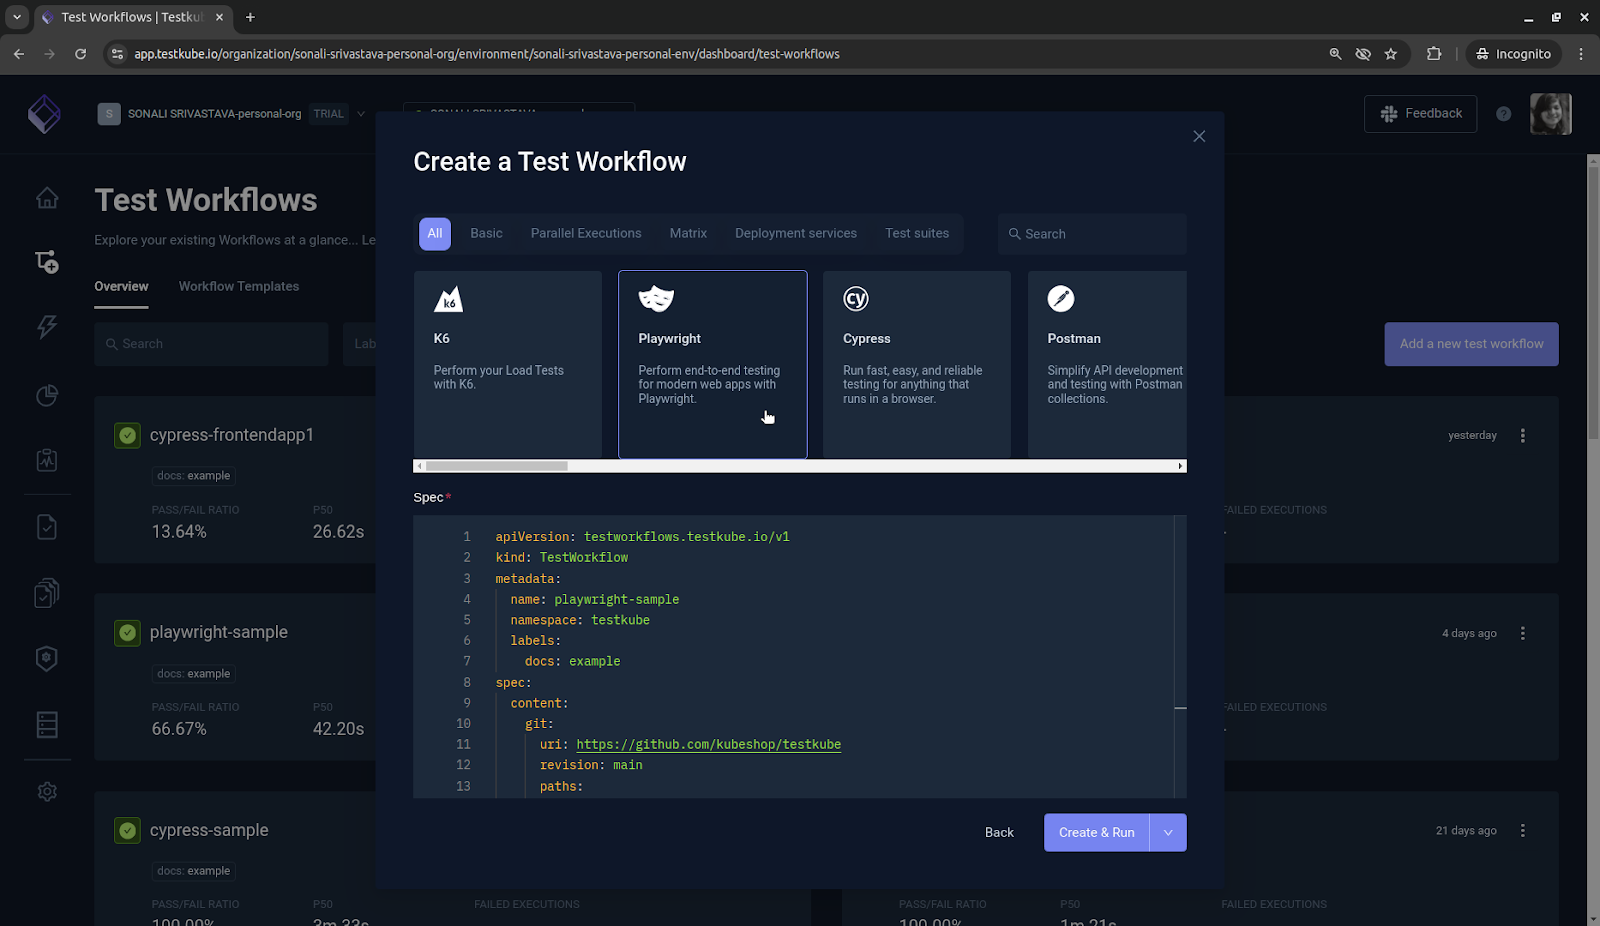
Update the Spec here with the path to your Git repository that has the tests. Here is what our Playwright configuration looks like:
Click on the “Create & Run” button to create and run the Test Workflow.
Testkube creates the Test Workflow and executes the tests as shown below:

What’s even better is that you also get to customize the test definition, schedule it, and access the artifacts produced when running the test:

Click on “Open report” and you can see all the tests that have been executed.
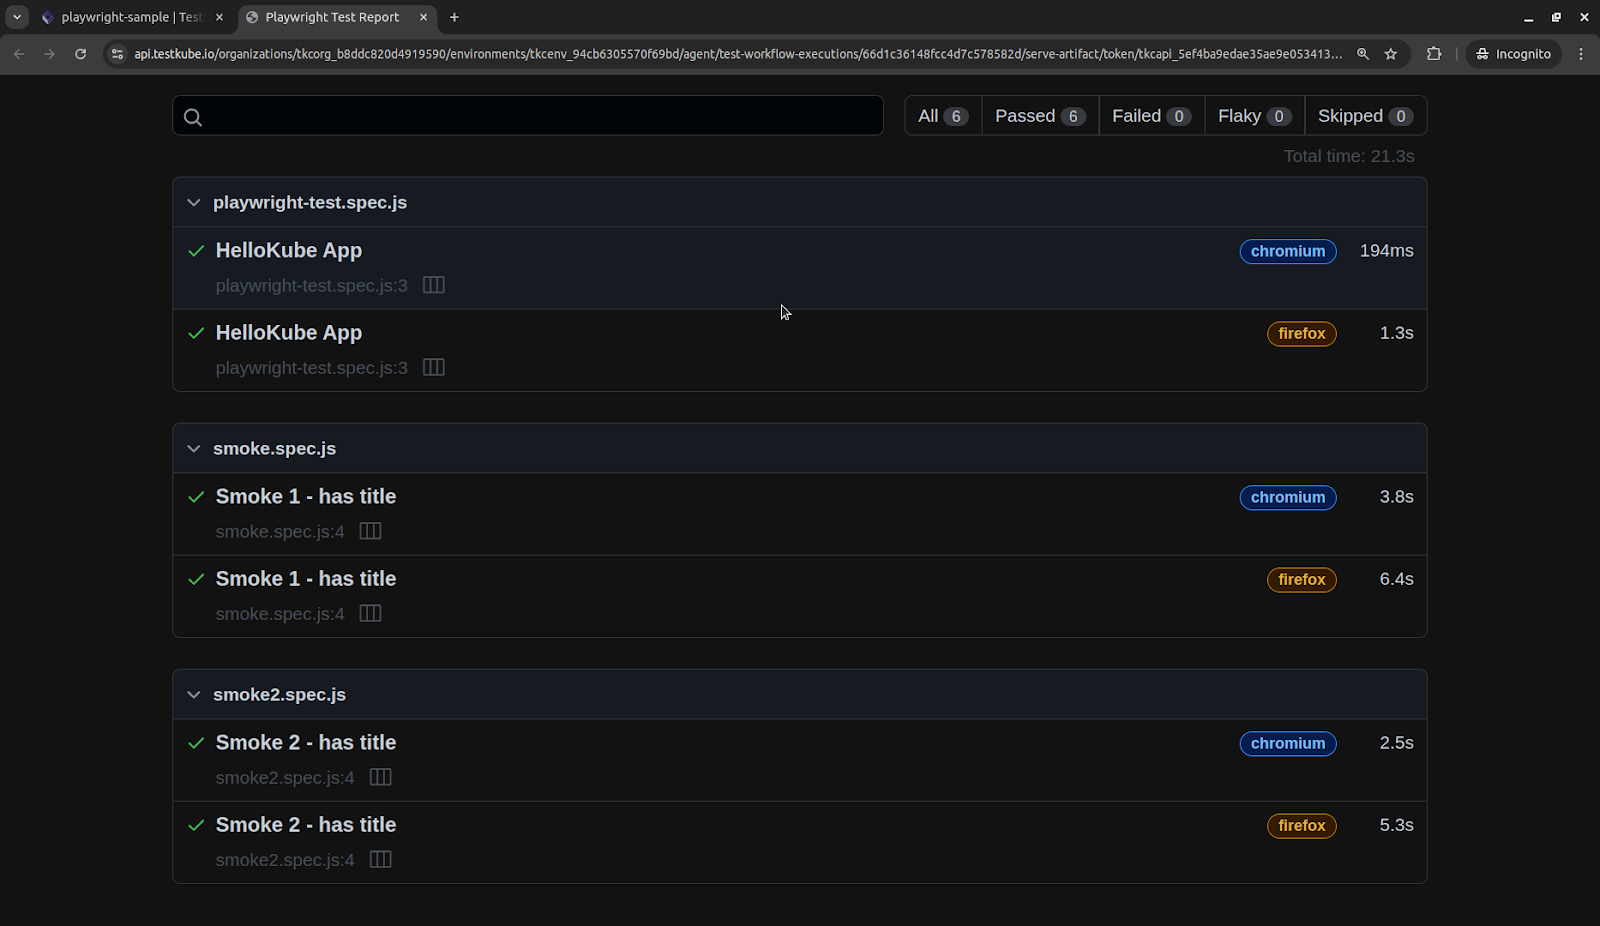
Select the “HelloKube App”, and you can view the details related to the test as shown below.
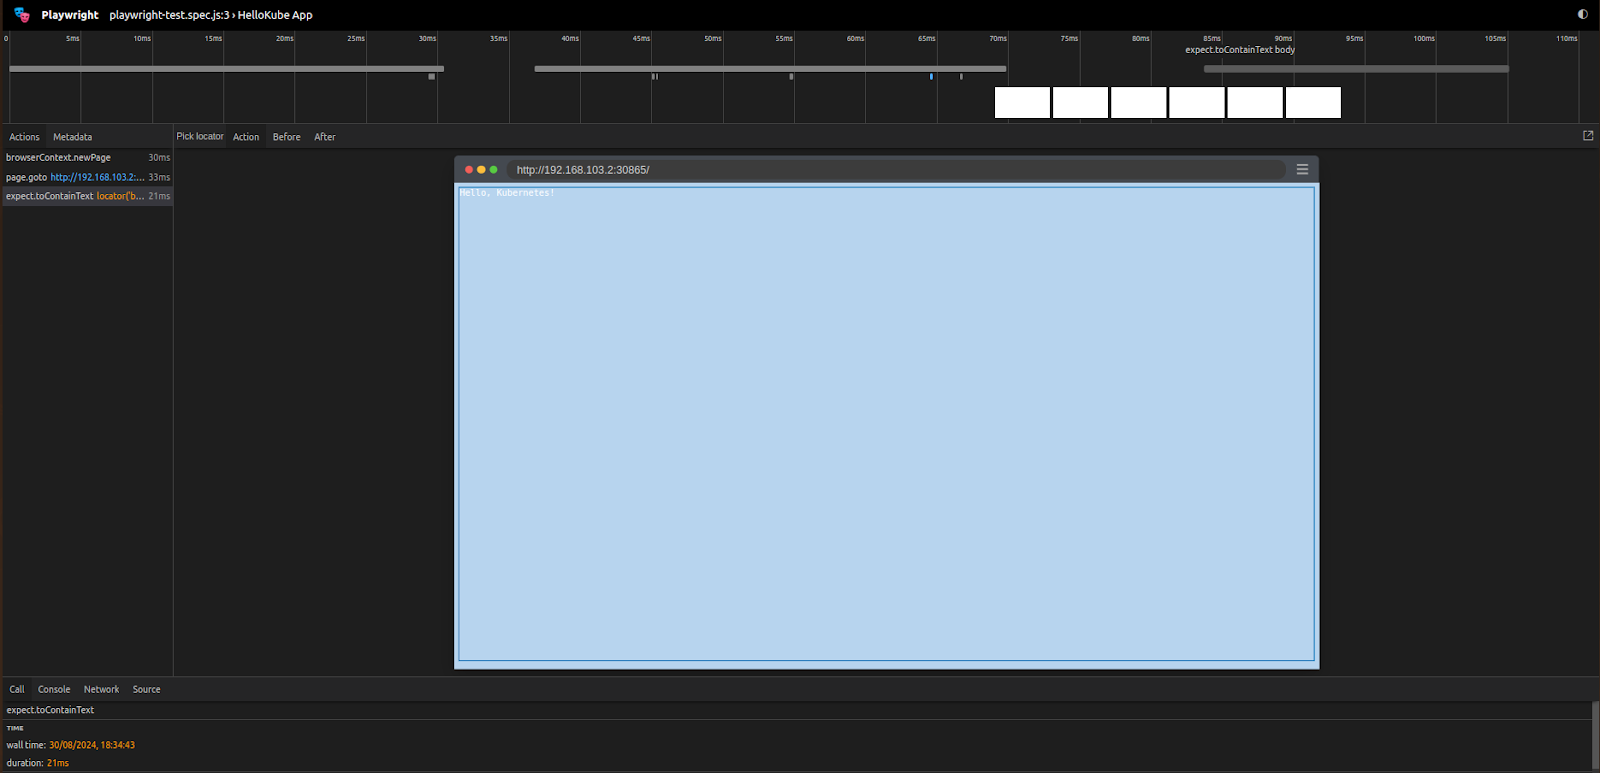
Both of these tests have been executed successfully.
And that’s it - that’s how simple it is to bring your front-end tests to the cloud!
Best Practices and Conclusion
Testing front-end applications in Kubernetes clusters presents unique challenges, but with the right approach and tools, you too can overcome these hurdles. Cloud-based testing, coupled with Kubernetes-native tools like Testkube, offers a comprehensive solution to ensure that you're still safeguarding the reliability and quality of your applications.
Key Benefits of Testkube for Kubernetes Testing:
- Kubernetes-native architecture designed for cloud environments
- Multi-framework support including Cypress, Playwright, and more
- Seamless CI/CD integration for automated testing pipelines
- Real-time test execution monitoring and logging
- Scalable testing infrastructure within your clusters
Get started with Testkube and experience all the features that it brings to the table! Why not give it a go yourself? Sign up for Testkube and try one of our examples or head over to our comprehensive testing documentation - if you get stuck or have questions, we're here to help! Find an answer to your questions reaching out to us on Slack. We're eager to hear how you use our integrations.


About Testkube
Testkube is a cloud-native continuous testing platform for Kubernetes. It runs tests directly in your clusters, works with any CI/CD system, and supports every testing tool your team uses. By removing CI/CD bottlenecks, Testkube helps teams ship faster with confidence.
Explore the sandbox to see Testkube in action.


